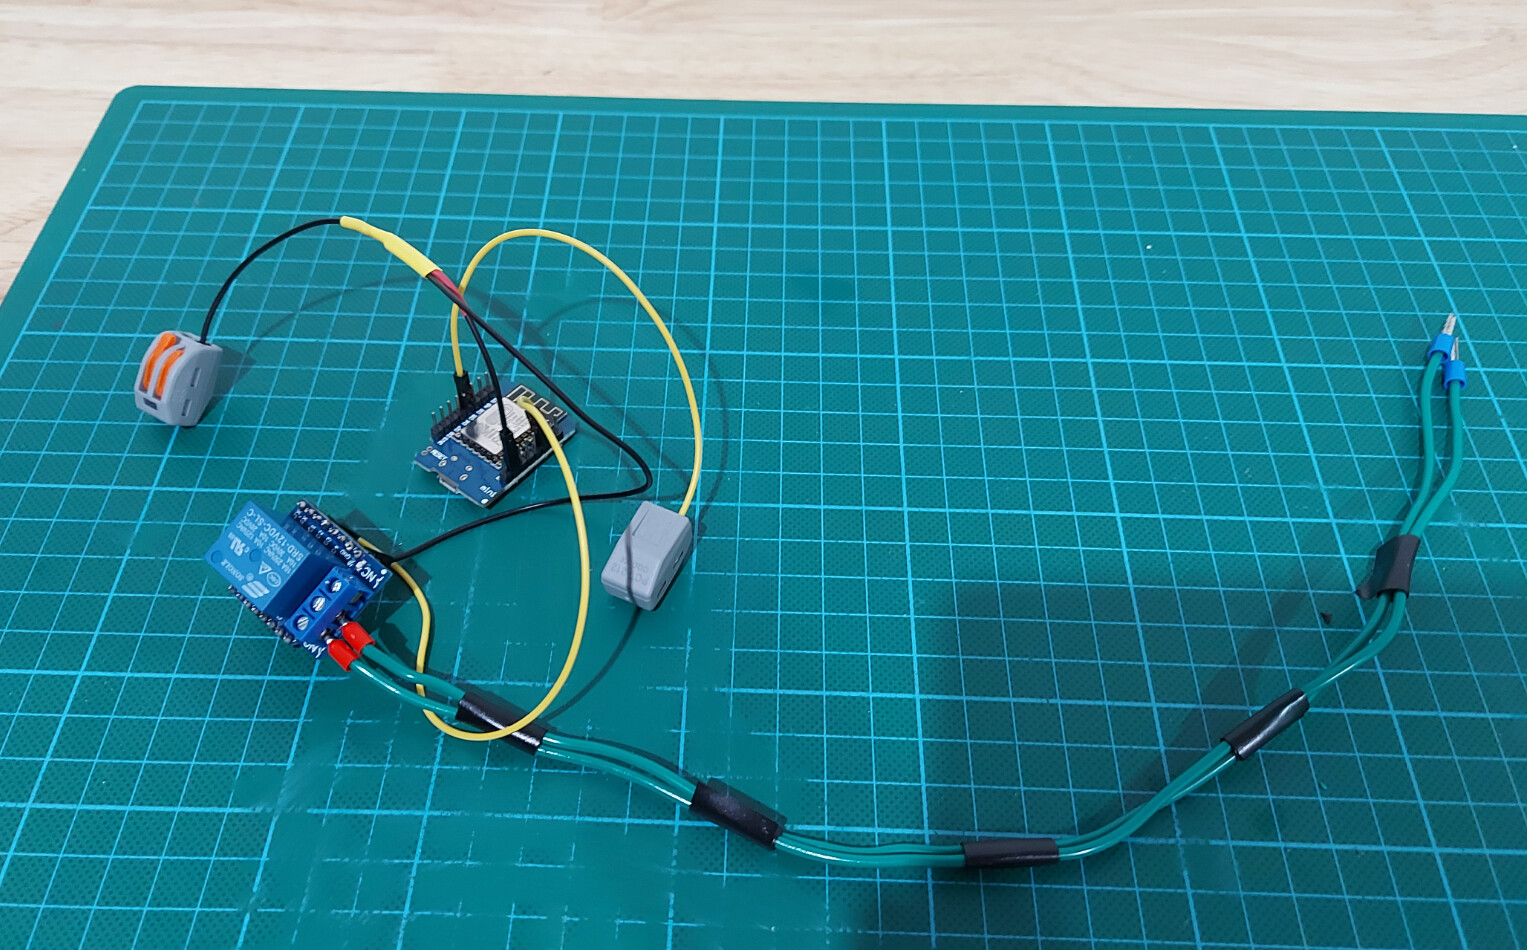
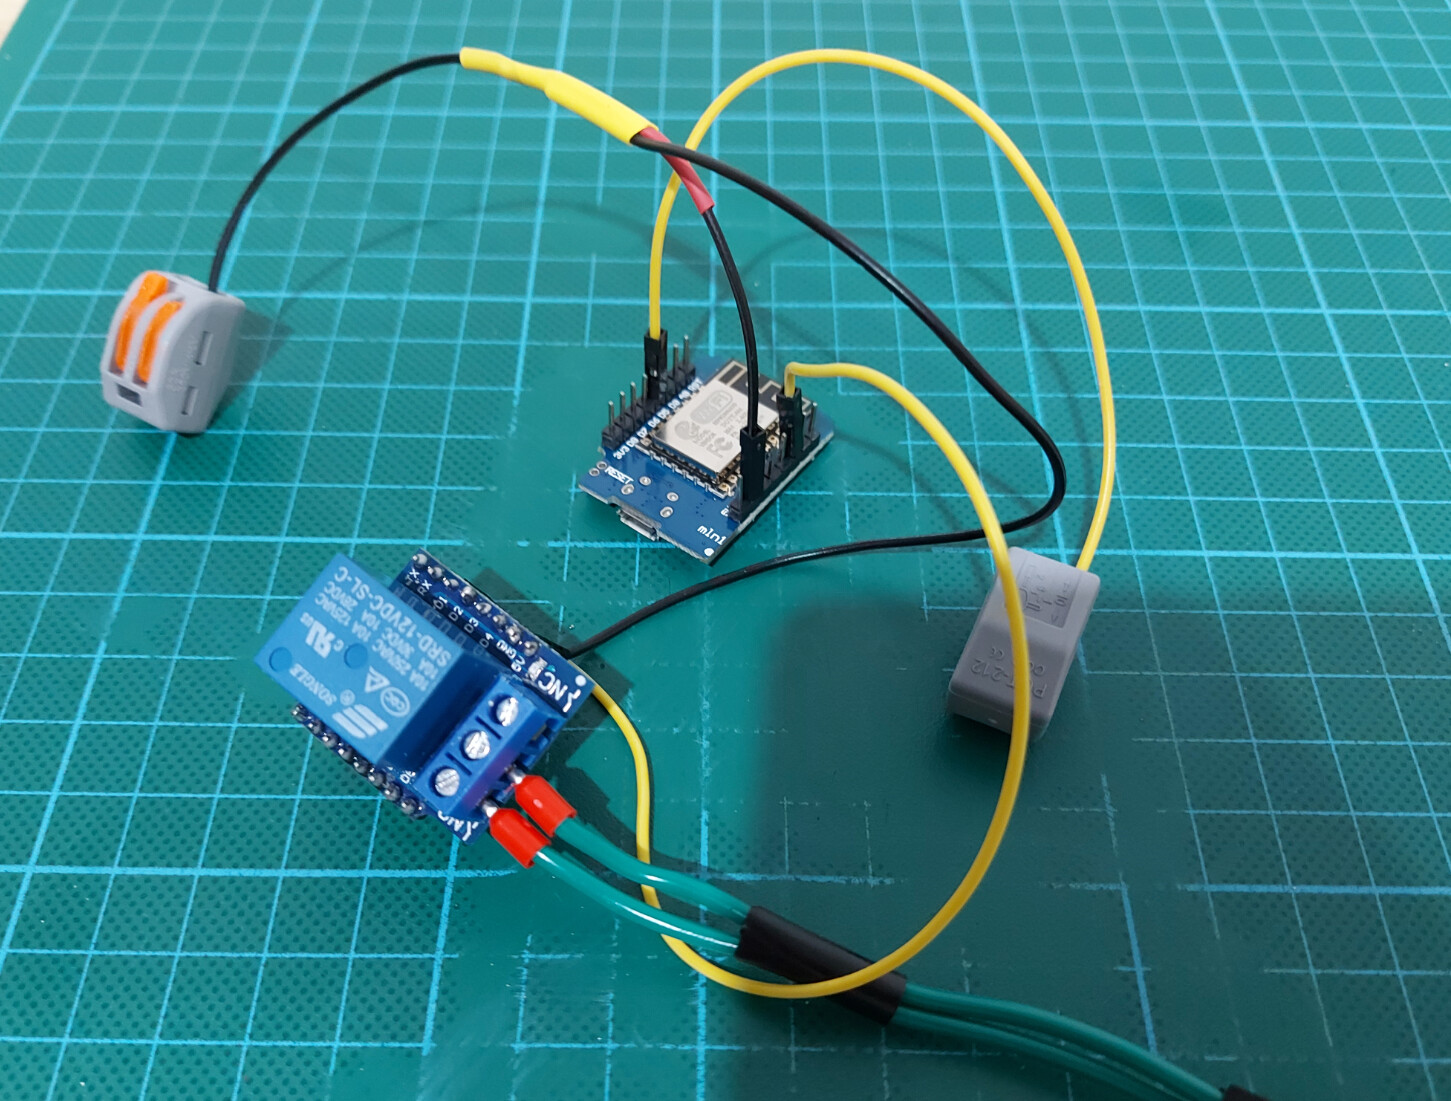
- Purchase your parts and then solder the headers together when it arrives. Item list is detailed below including some pics of the setup (harness) together.
a. Wemo’s D1 mini
i. Page Not Found - Aliexpress.com
b. 1 channel Relay Shield for WEMOS D1 mini
i. 1Set Ein Kanal Wemos D1 Mini Relais Schild Wemos D1 Mini Relais Modul für ESP8266 Entwicklung Bord 1 kanal|shield relay|relay moduled1 mini - AliExpress
c. Dupont Jumper cables (female to female)
i. 50 stücke 10CM/20CM/30CM Dupont Kabel Draht Für Arduino Breadboard Männlich weibliche Dupont Jumper draht Kabel 1P 1P 2,54 MM Draht Stecker|Drähte und Kabel| - AliExpress
Note, you will need some cable to go from the 1 channel relay shield to your garage door (note in green in the picture).
-
Install Tasmota @markus Hubitat firmware details here onto your Wemo’s D1 mini device and follow the below.
a. You will see an AP pop up showing TasmotaXXXX. click on that to join then type into your web browser 192.168.4.1.
b. Fill out your wireless username, password and type in YOURHOSTNAME for the device example. Garage Door Controller. click save.
c. Find your devices new IP address. Also don’t forget to add a STATIC IP or DHCP reserved address on your router as you don’t want the IP to change then type that into your web browser. -
Configure Tasmota portal by clicking on “configuration”, “configure module” and changing:
a. D1 to Relay1 (wemos 1 channel relay)
b. D7 to Relay2 (not physical connected)
c. D5 to Switch2 (reed switch) -
While still within the Tasmota portal click on “console” and type in the following:
a. “pulsetime1 5” for turning on for 0.5 seconds then off again.
b. “switchmode2 1” for disabling it as a toggle switch.
c. ONLY IF REQUIRED - “switchmode2 2” if your reed switch shows ON when closed so this inverts it. -
Configure your newly loaded device into Hubitat e.g. “add virtual device” and select the “Tasmota - Universal Parent” driver.
a. this assumes you familiar with the existing Tasmota Hubitat drivers and how to load them etc. -
Configure your unique settings and hit “refresh” which will build two new Child devices under the parent device e.g POWER1 and POWER2.
a. POWER1 is the reed switch on D5.
b. POWER2 is the wemos 1 channel relay on D1. -
Click on the POWER2 and change the driver to “Tasmota - Universal Switch as Garage Door (Child)”
a. this assumes you familiar with the existing Tasmota Hubitat drivers and how to load them etc. -
POWER1 will remain unchanged as it should already be assigned the “Generic Component Switch” driver.
-
You are now ready to physically wire this all together.
a. Connect your reed switch to D7 and GND on the Wemos D1 mini. Note reed switch mounting options can be found in DrZzz Youtube video here
b. Connect your Wemos 1 channel relay to D1 and GND on the Wemos D1 mini. Note you will need to share the ground wire with the reed switch as a Wemos D1 mini only has a single ground connection so just splice them together.
i. Connect your Wemos 1 channel relay as per picture and then other end will be plugged into your garage door motor. You can find informaiton on how to do this by viewing DrZzz Youtube video here
c. Do not physically connect D7 to anything it’s not supposed to be physically connected to make this project work. -
You are now finished so please enjoy this automation. If you any questions, please ask us in the community and we will be happy to help


