The background here is that I have a large number of Xiaomi Aqara/Mijia sensors that I used on Hubitat with @markus’ drivers. Because it appears unlikely he can continue maintaining his drivers and Keith Gaumont (@veeceeoh) has pretty much abandoned his, I had moved my Xiaomi sensors to two Mijia Smart Home Gateways (model DGNWG02LM). This older model doesn’t have HomeKit access and also doesn’t support zigbee 3.0 devices. However, it does expose a local LAN connection, and there are direct integrations of this gateway to Node-RED (which I use for automation), and also Home Assistant. In addition, @fison67 has written a Docker-based integration to bring devices paired to this gateway into Hubitat/SmartThings.
This approach worked, but I felt I just had a proliferation of zigbee coordinators in my small townhome (2 Hubitats, 2 Mijia gateways, 1 Almond 3). And it also didn’t support newer zigbee 3.0 Aqara sensors. So about 2-3 weeks ago, I decided to setup zigbee2mqtt, and if it worked, transition to it.
I have now moved all my Aqara devices and a few Hubitat-connected devices to zigbee2mqtt, and this (lengthy) post is a description of that move.
Hardware:
I am running zigbee2mqtt on bare-metal Linux. In my case, a headless Odroid-N2 running Armbian Buster. This same hardware runs every else I have that is network or IoT related, including Node-RED.
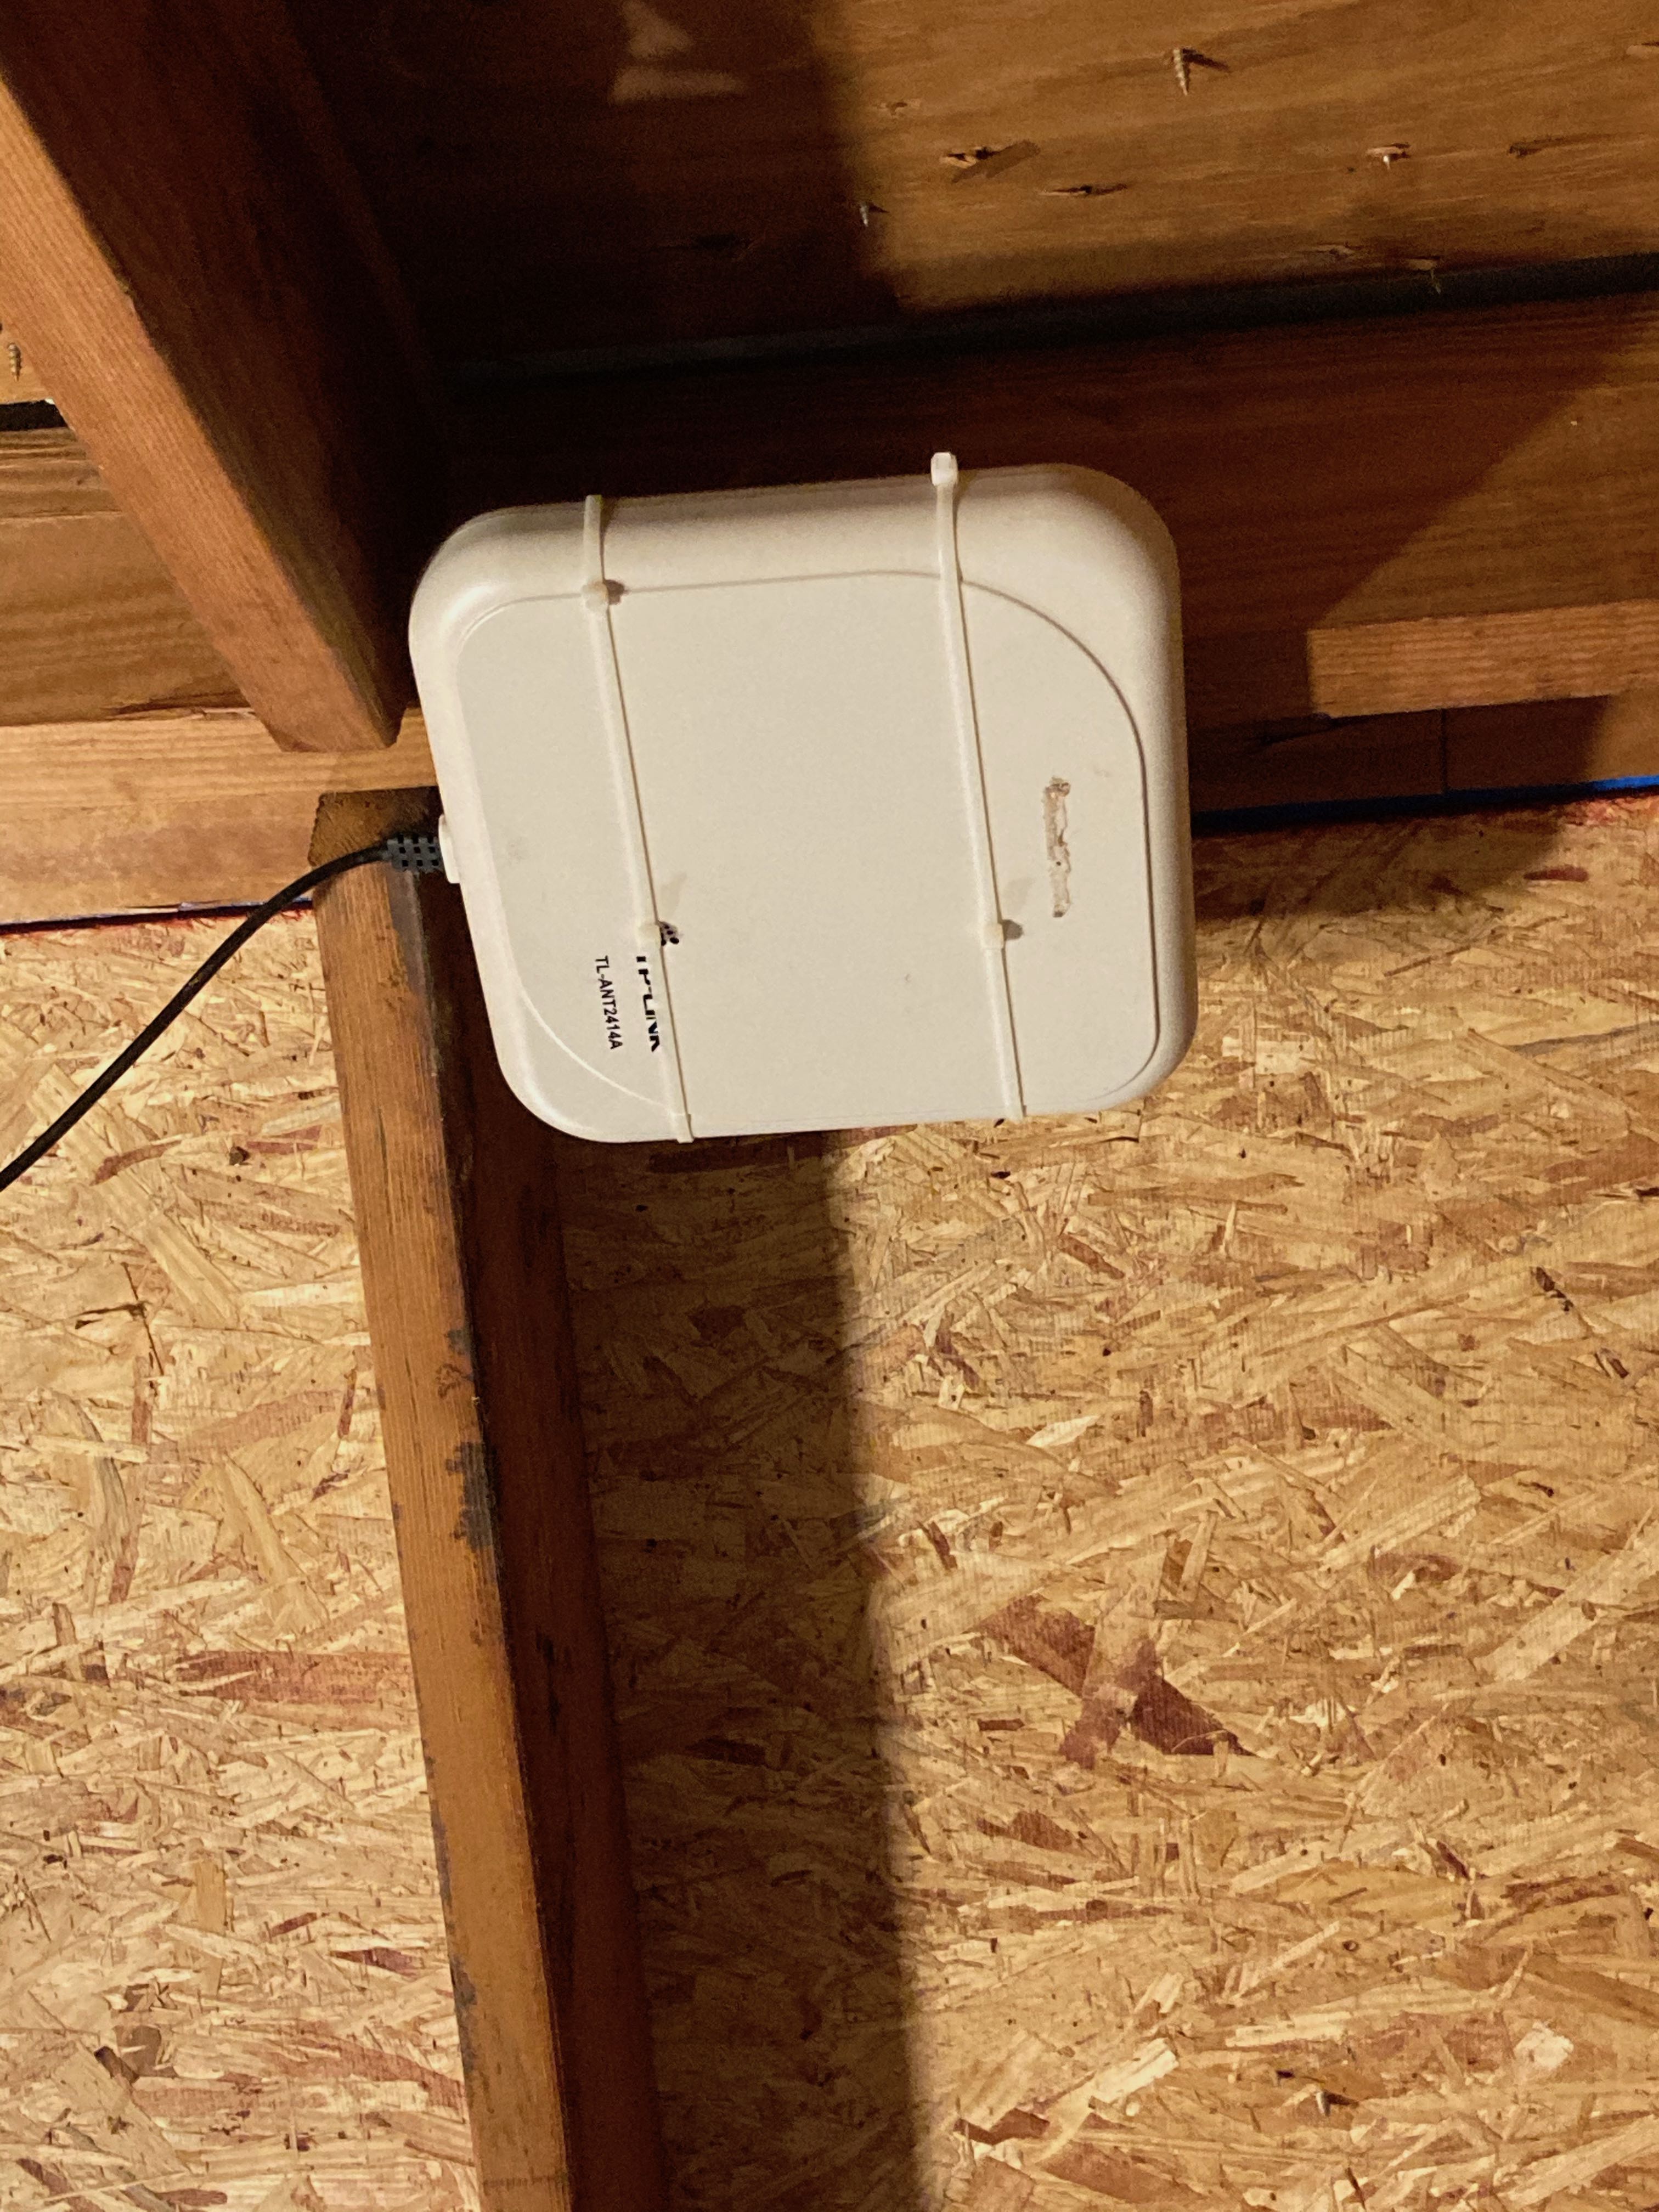
Zigbee2MQTT supports a variety of adapters that range in price from $5 and up. I chose slaesh’s CC2652RB stick. Inclusive of shipping, it was about US $40, and came pre-flashed with zigbee 3.0 coordinator firmware. It is claimed to directly support 100+ zigbee end-devices, and off course, even more with zigbee repeaters/routers. This stick has a replaceable external antenna (more about that later). The specific stick I got is the “type 1” stick shown below:

It is recommended to keep the stick far away from the computer running zigbee2mqtt, so I have it connected via a 6-foot USB extension cable.
Software:
Zigbee2MQTT has built-in support for Home Assistant, which I don’t use. I installed zigbee2mqtt using the instructions for bare-metal Linux. The directions were really simple to follow. The only difference is the location of the serial device (zigbee adapter). It is /dev/ttyUSB0 with Buster vs /dev/ttyACM0 with Raspbian.
There are also multiple sets of zigbee2mqtt nodes for Node-RED, which off course require an MQTT server. I am already using Mosquitto for other purposes including geolocation with OwnTracks; Mosquitto runs on the same Odroid N2 as zigbee2mqtt (and Node-RED). The most elaborate I found was node-red-contrib-zigbee2mqtt-devices. I ended up using a substantially simpler set of nodes called node-red-contrib-zigbee2mqtt, which as it turned out - work really well for my needs.
There are also a few Node-RED dashboards built for zigbee2mqtt that are convenient (see screenshots below). I use one called Zigbee2MQTT Admin. Zigbee2MQTT also has a built-in web-based frontend, but I have entirely used just the dashboard linked here.
The node-red-contrib-zigbee2mqtt palette provide the following 4 nodes:
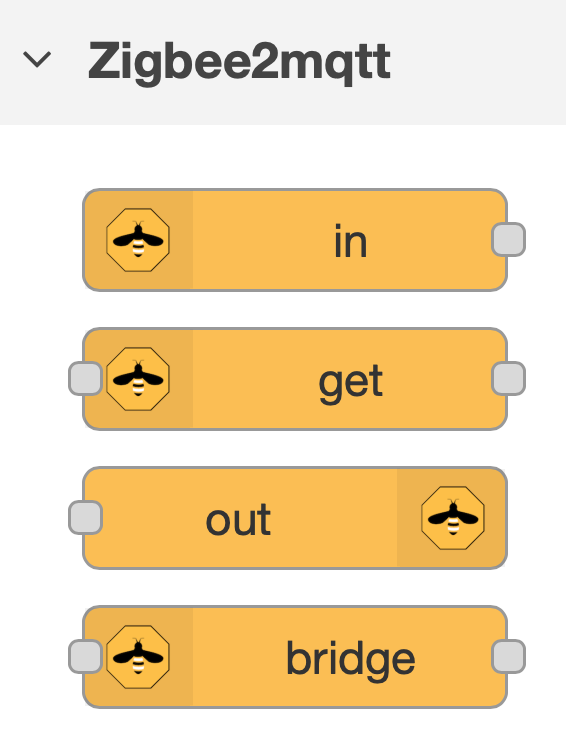
The bridge node controls zigbee2mqtt - it permits pairing, removing a device, giving devices friendly names, and also provides a map of zigbee network.
The in node provides state changes from devices (eg. contact open/close, motion active/inactive, color change etc. etc.).
The out node controls device state using msgs. Multiple changes are possible using JSON formatted payloads.
Finally, the get node obtains device status on demand.
It is recommended to set pairing to be false (i.e. off) in the zigbee2mqtt configuration file (/opt/zigbee2mqtt/data/configuration.yaml), and then turn it on/off as needed using MQTT messages, the device node, the built-in web frontend, or the very convenient Zigbee2MQTT Admin dashboard shown here:
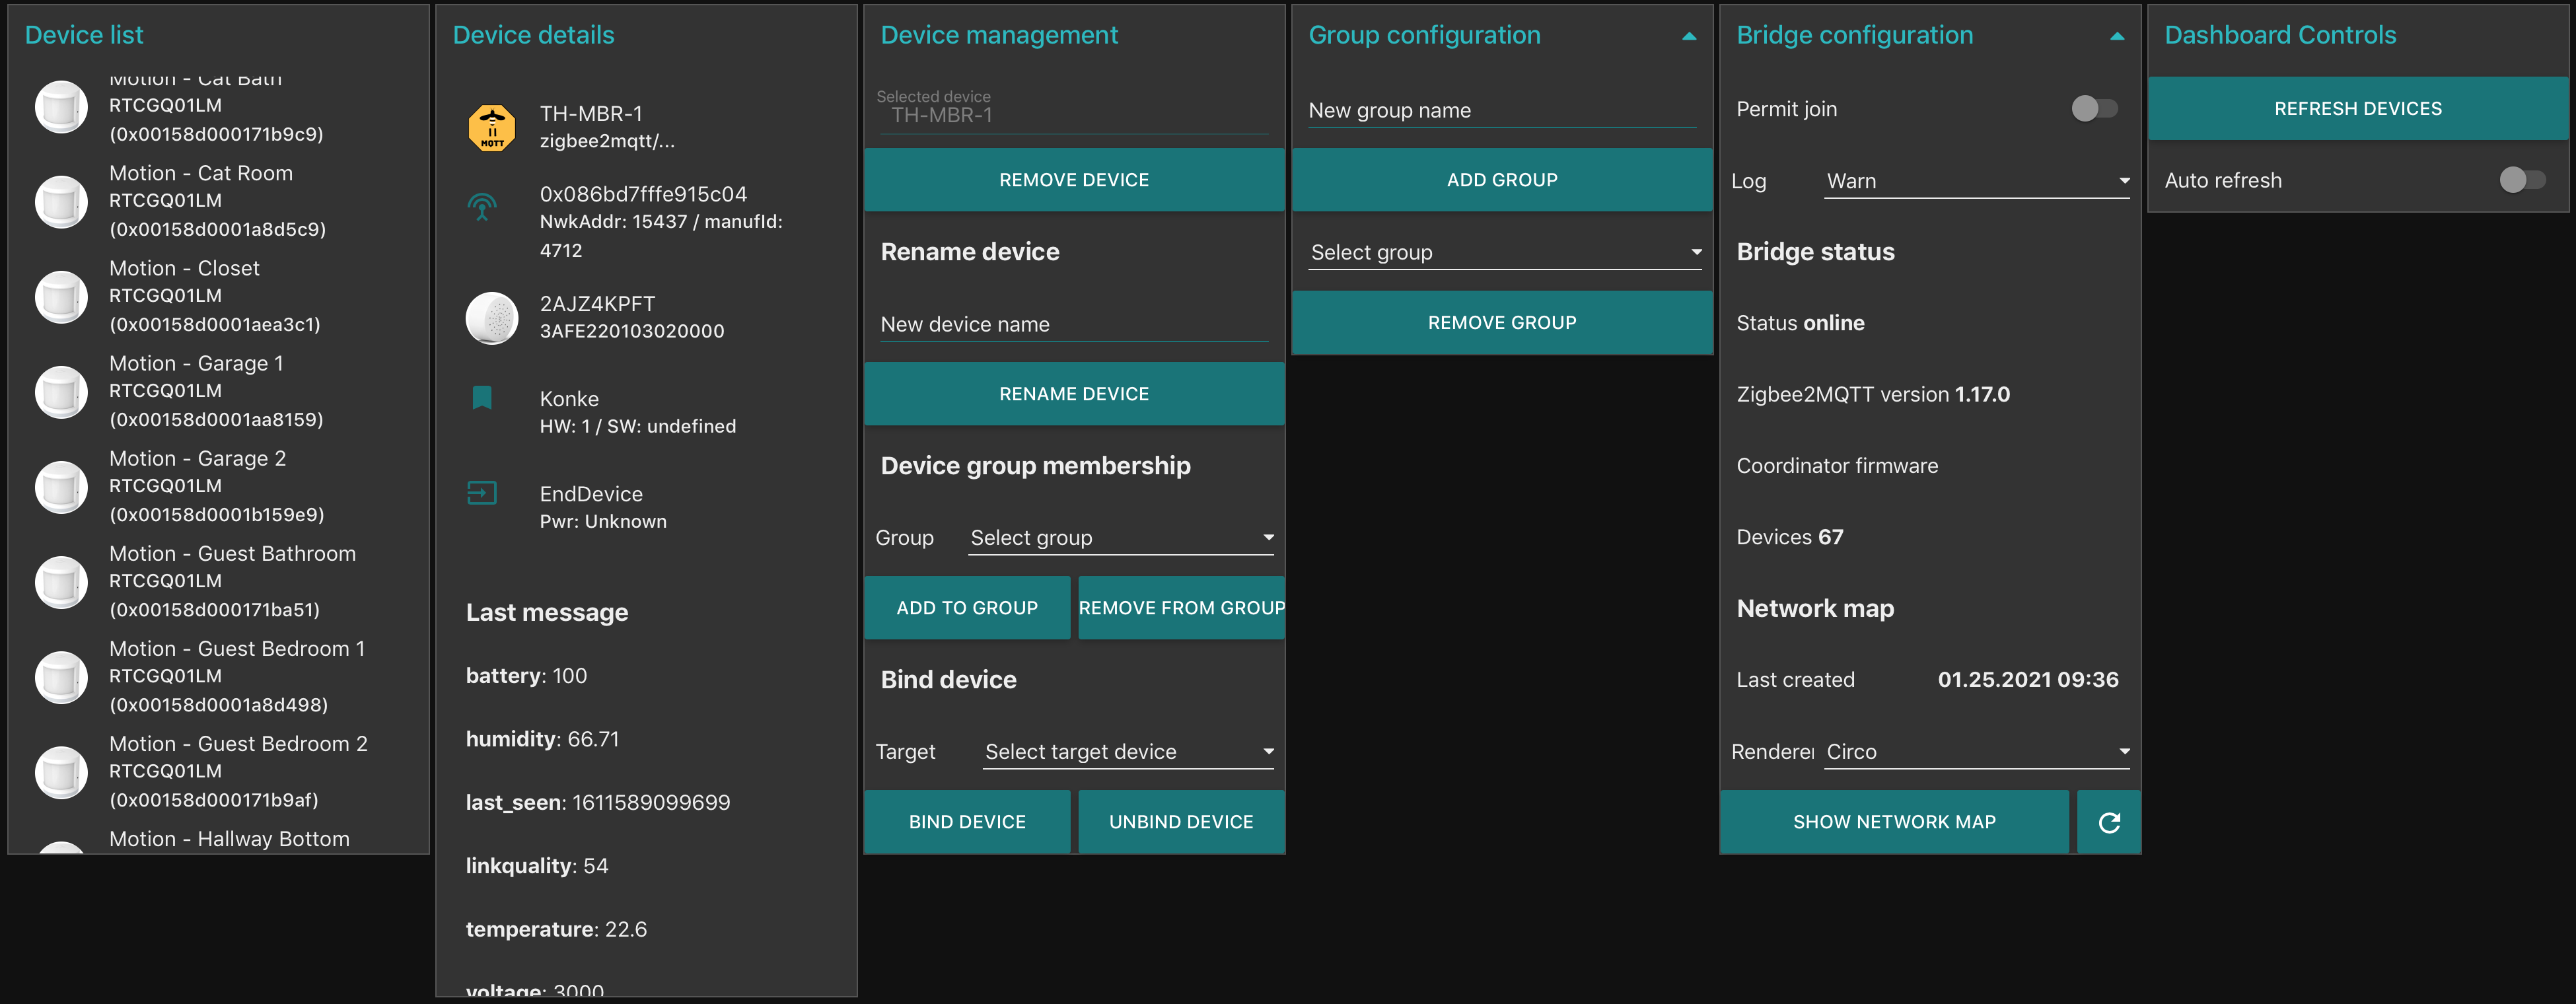
This dashboard has several panels. Pairing can be turned on/off from the Bridge configuration panel. Devices can be named/removed using the Device management panel. Details about individual devices can be seen in the Device details panel by clicking on the device in the Device list panel.
It took me just a few hours to move all my Aqara/Mijia devices to zigbee2mqtt. I started out by moving 6 Tradfri repeaters, 4 Tradfri outlets, and 2 Innr plugs - all of which are zigbee 3.0 devices and can function as repeaters/routers for the Mijia/Aqara devices that I have.
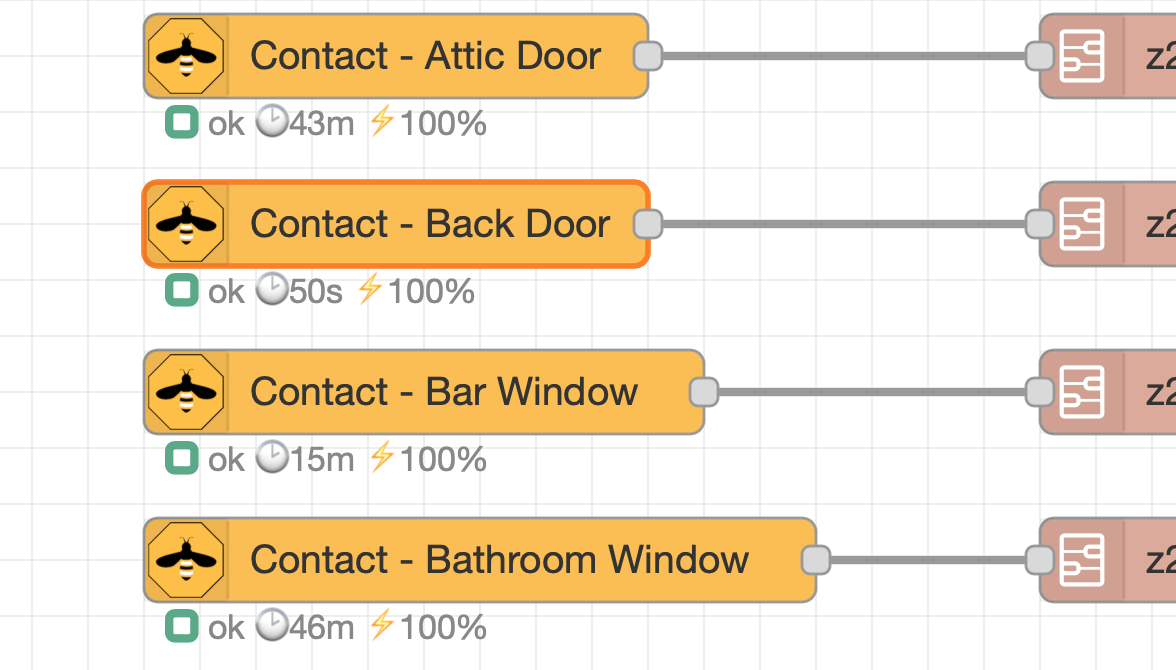
I configured zigbee2mqtt so that each device node shows the % battery life reported, along with the last time the device communicated with the CC2652RB coordinator (the USB zigbee stick). The device nodes look like this:
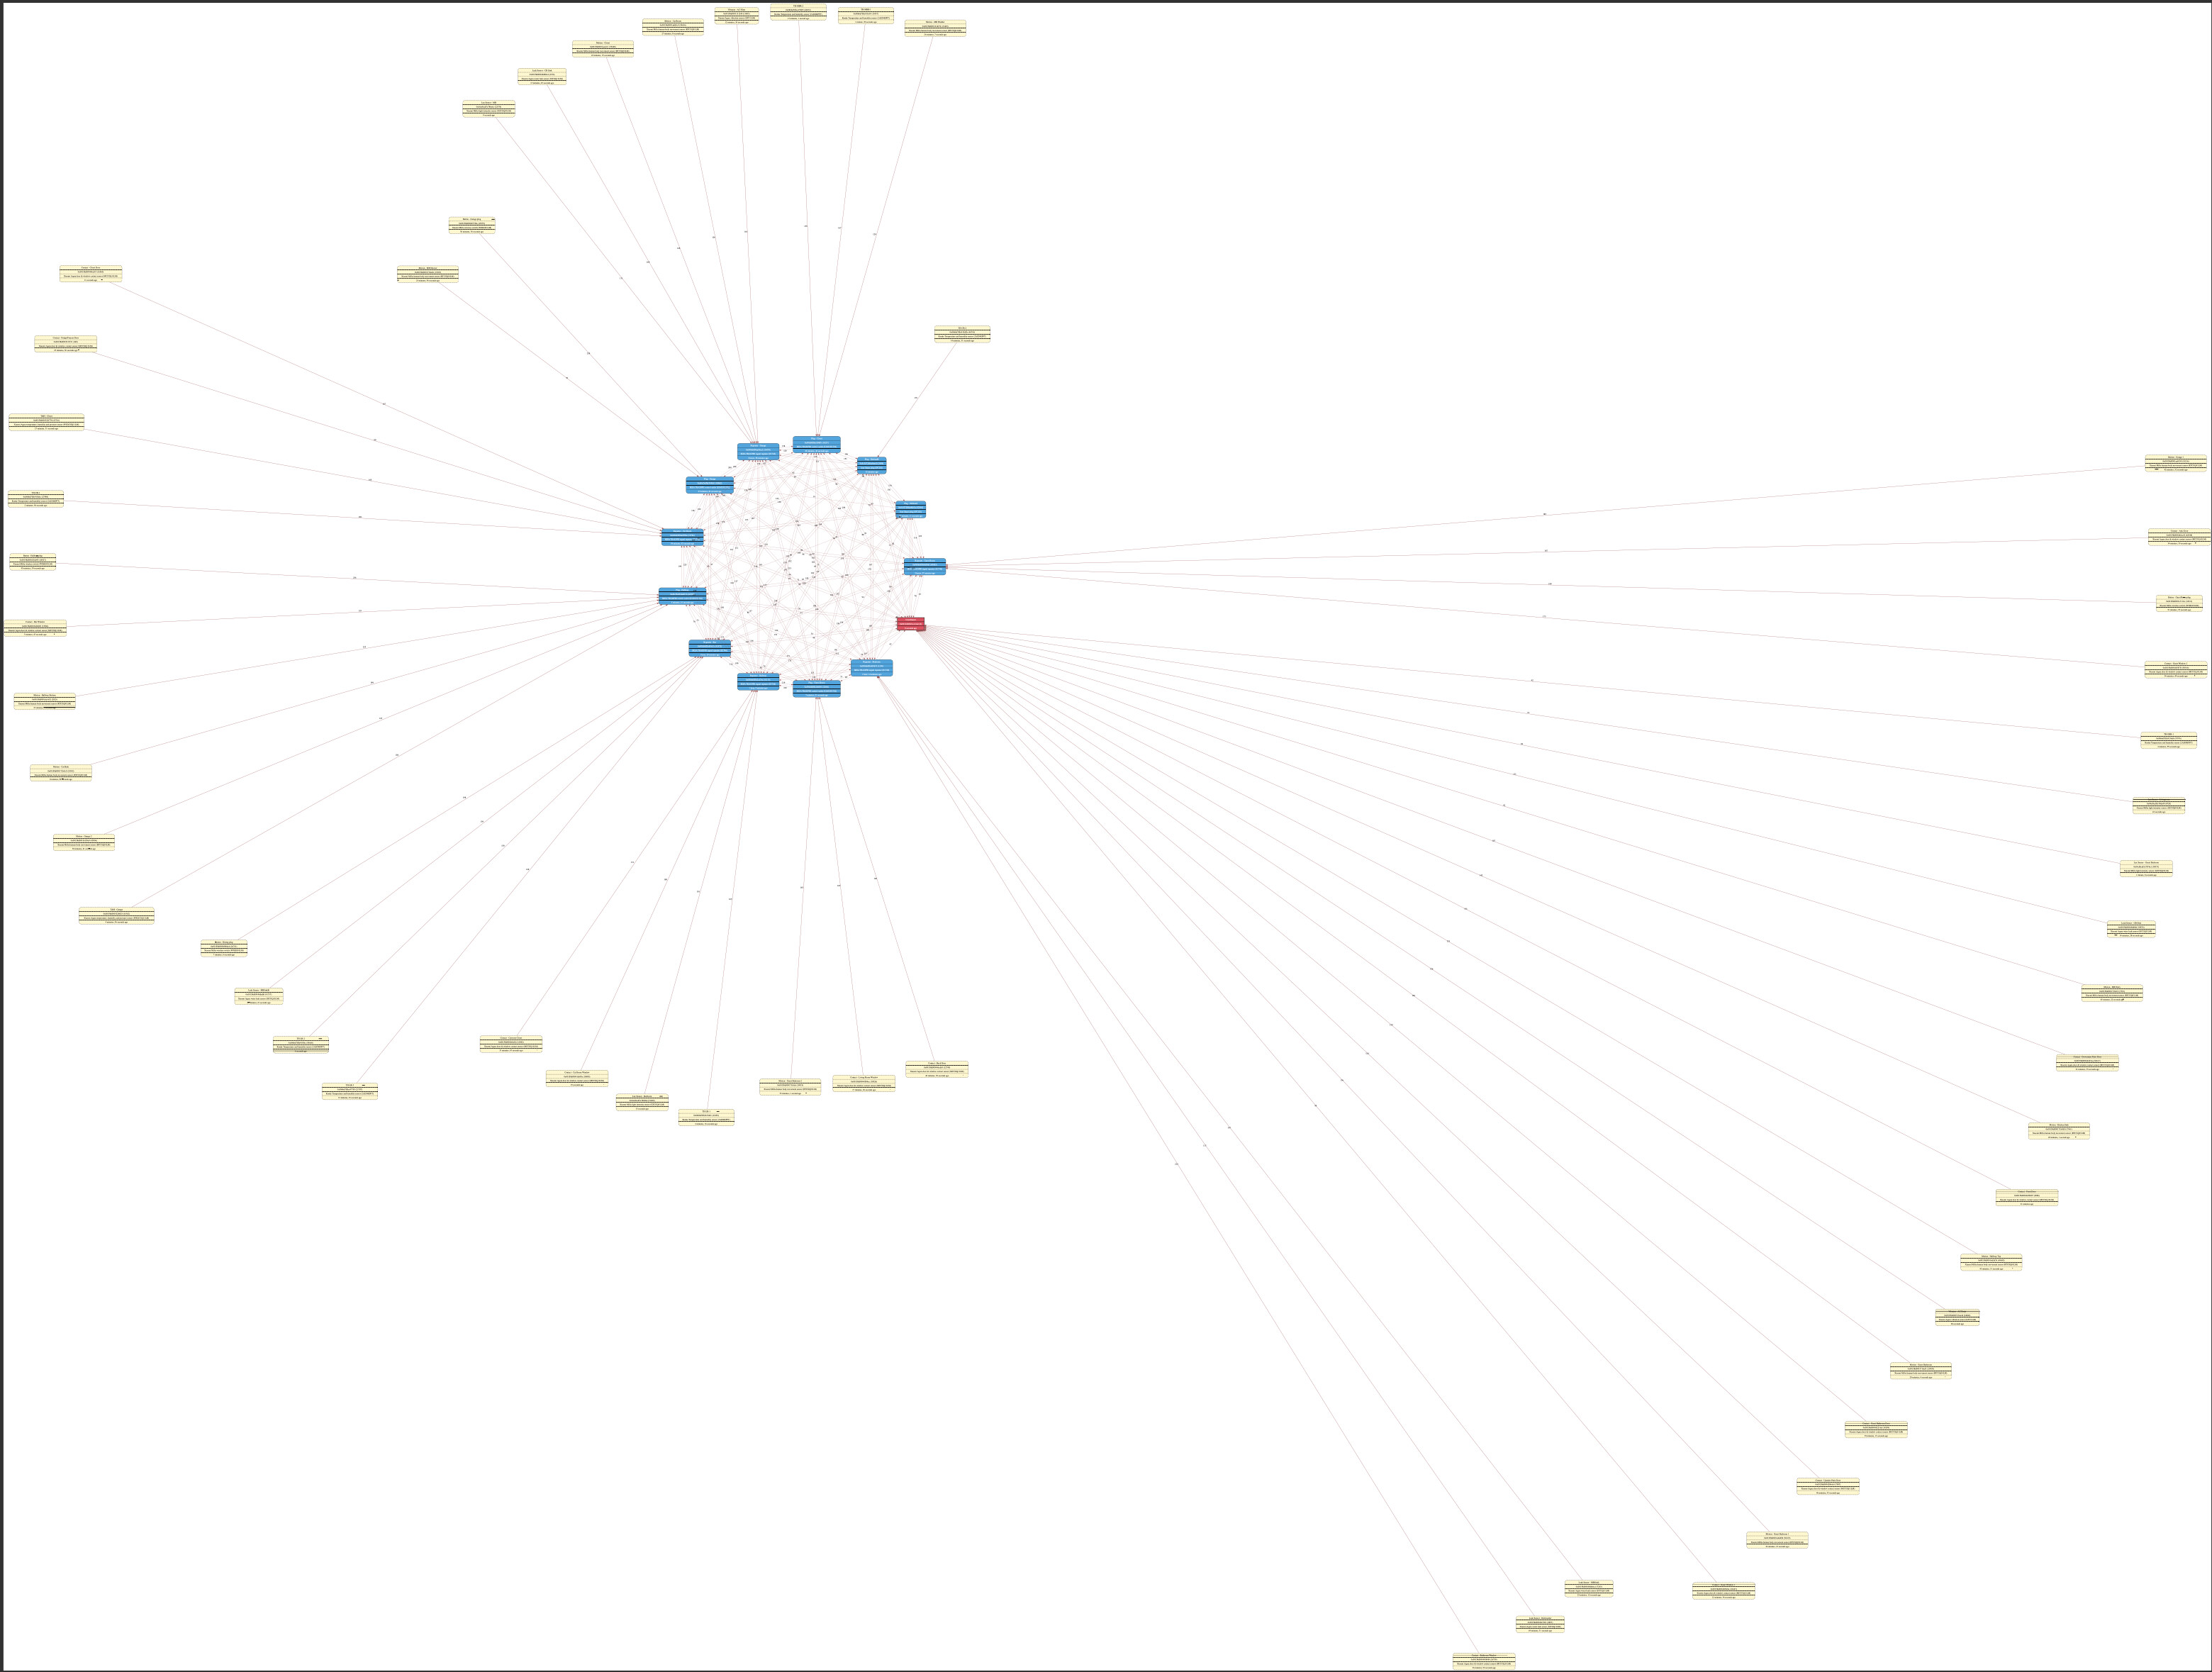
It has been about 3 days now - there haven’t been any devices that have dropped off. The network topology can be displayed by the dashboard (using the Bridge configuration panel) using a few different methods. Here’s what it looks like using the “fdm” graphical output:
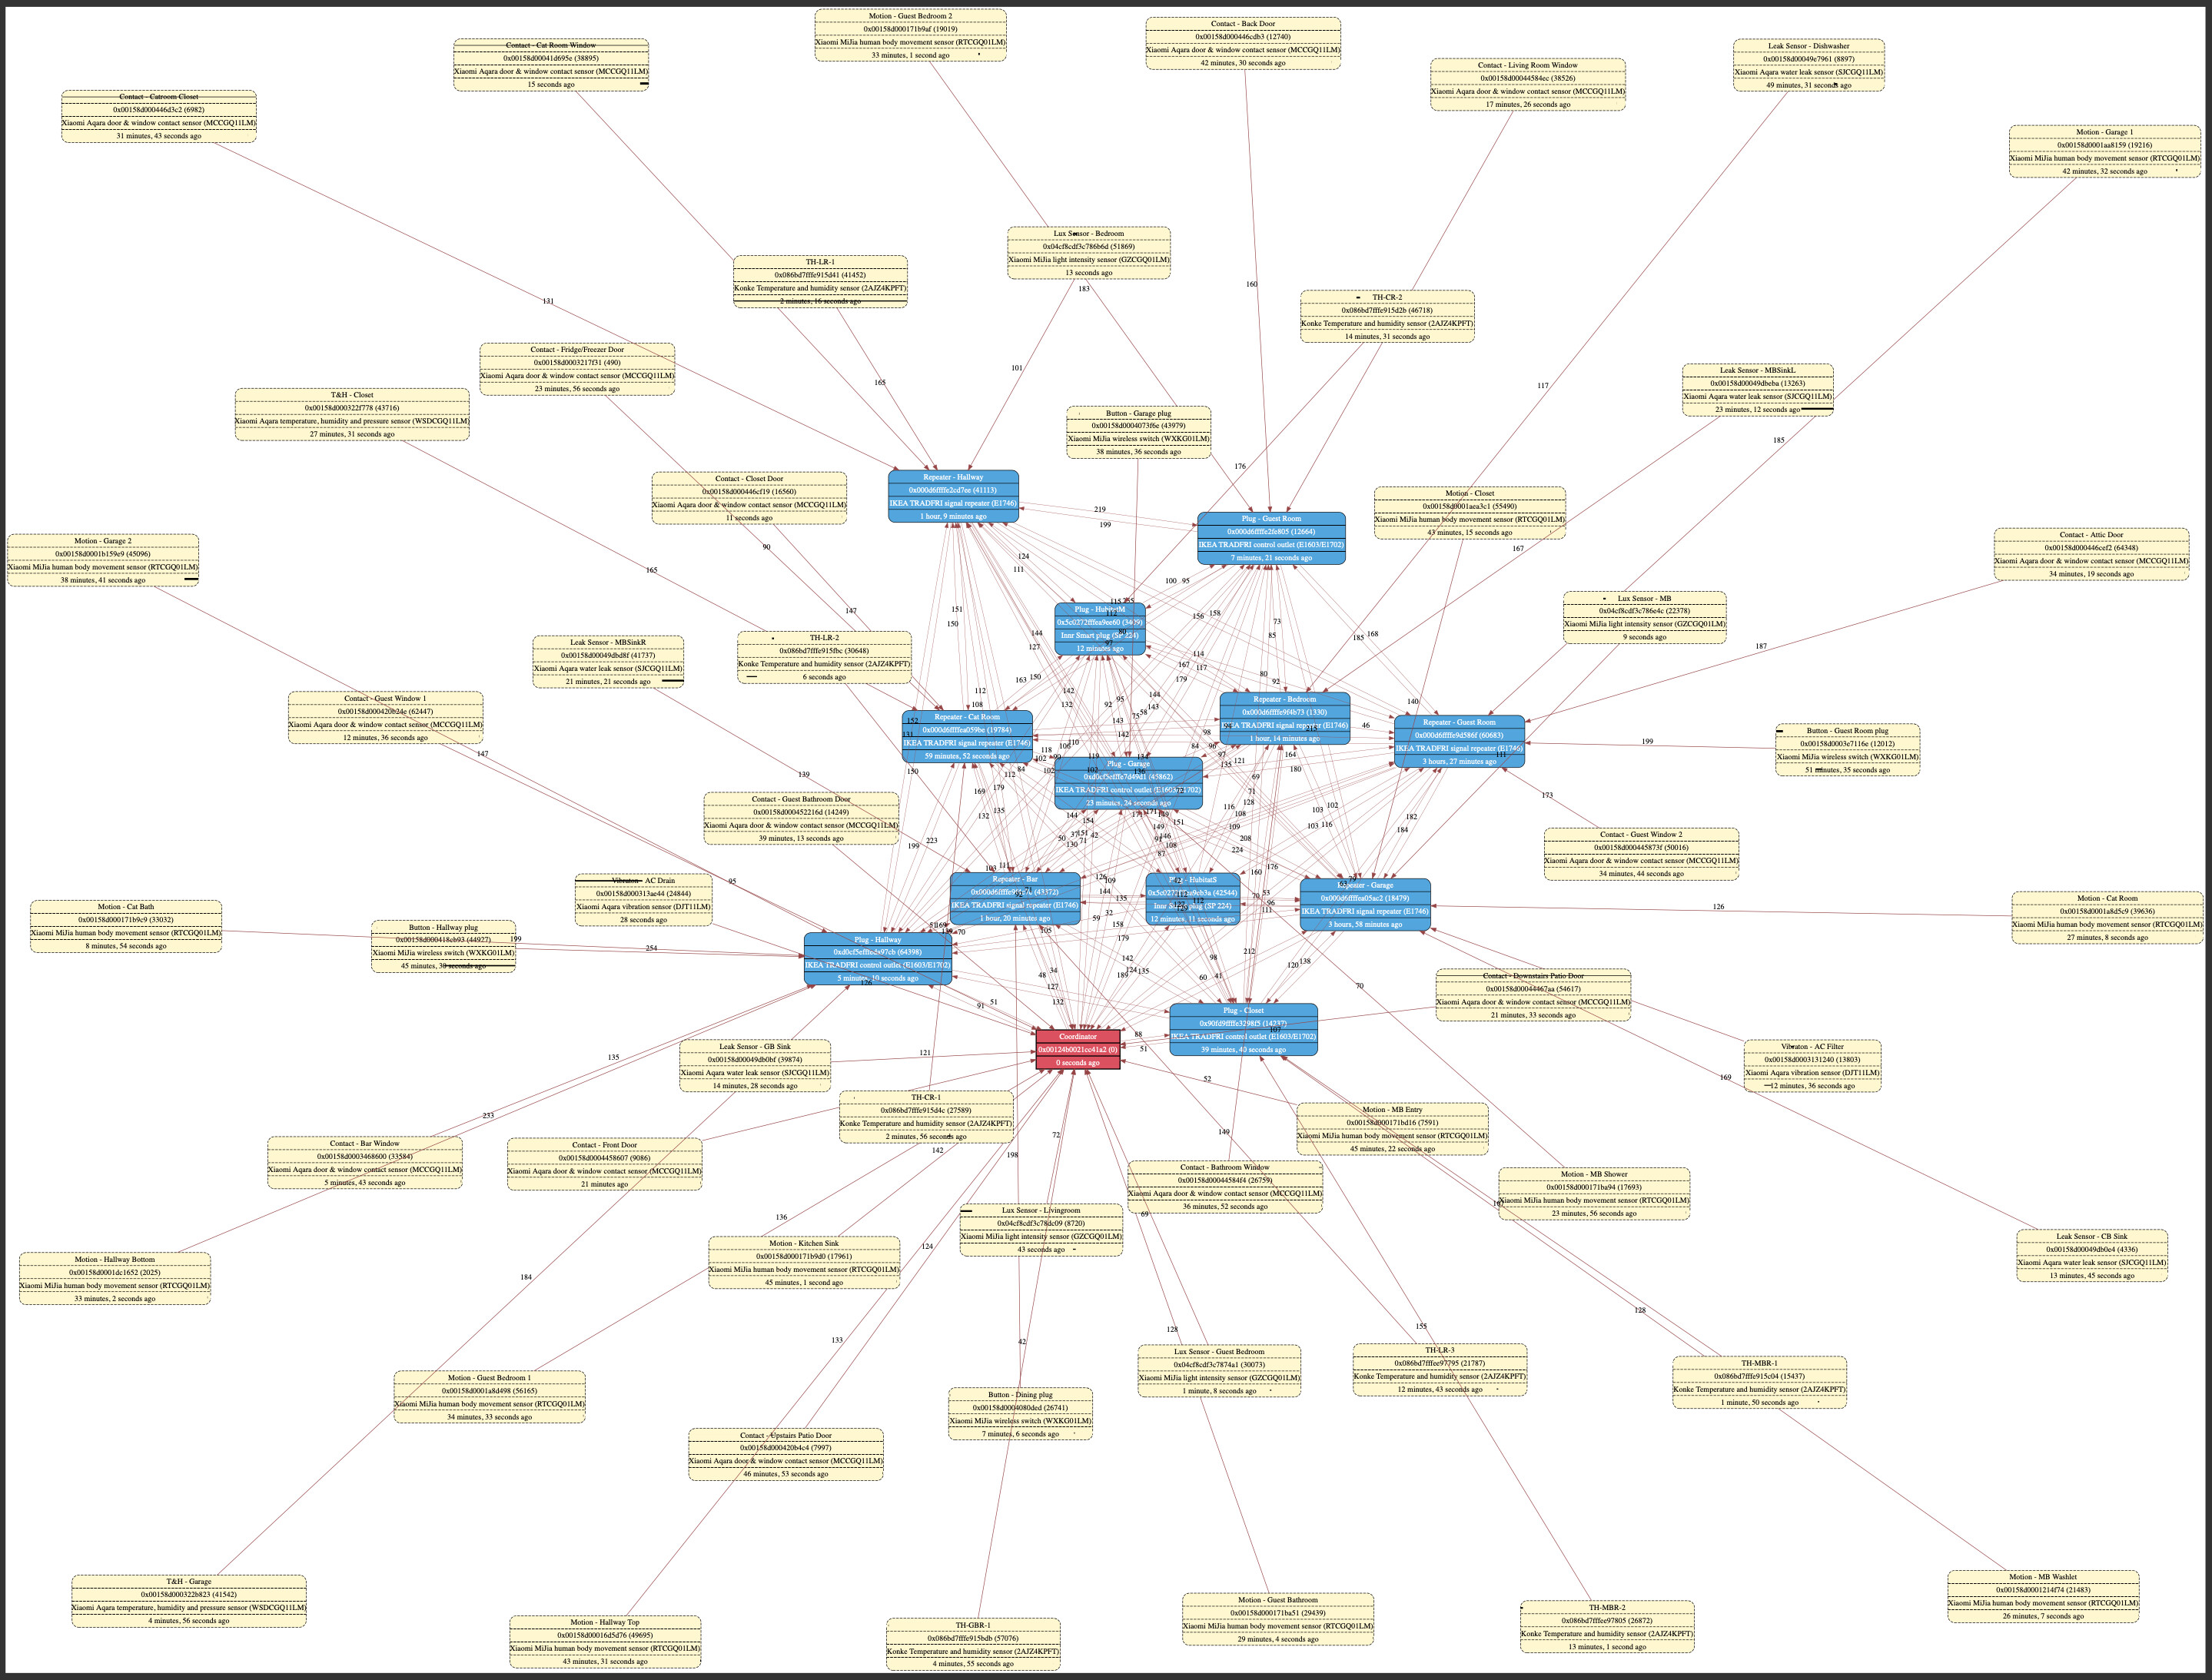
The coordinator is in red, the routers/repeaters are in blue, and the end-devices are in pale yellow.
Maps can be zoomed into display details of each device (see below). Maps drawn with the “Circo” display are somewhat more useful and can indicate the router used by each device.
Here’s a zoom in of the Circo map just focused on the coordinator and routers:
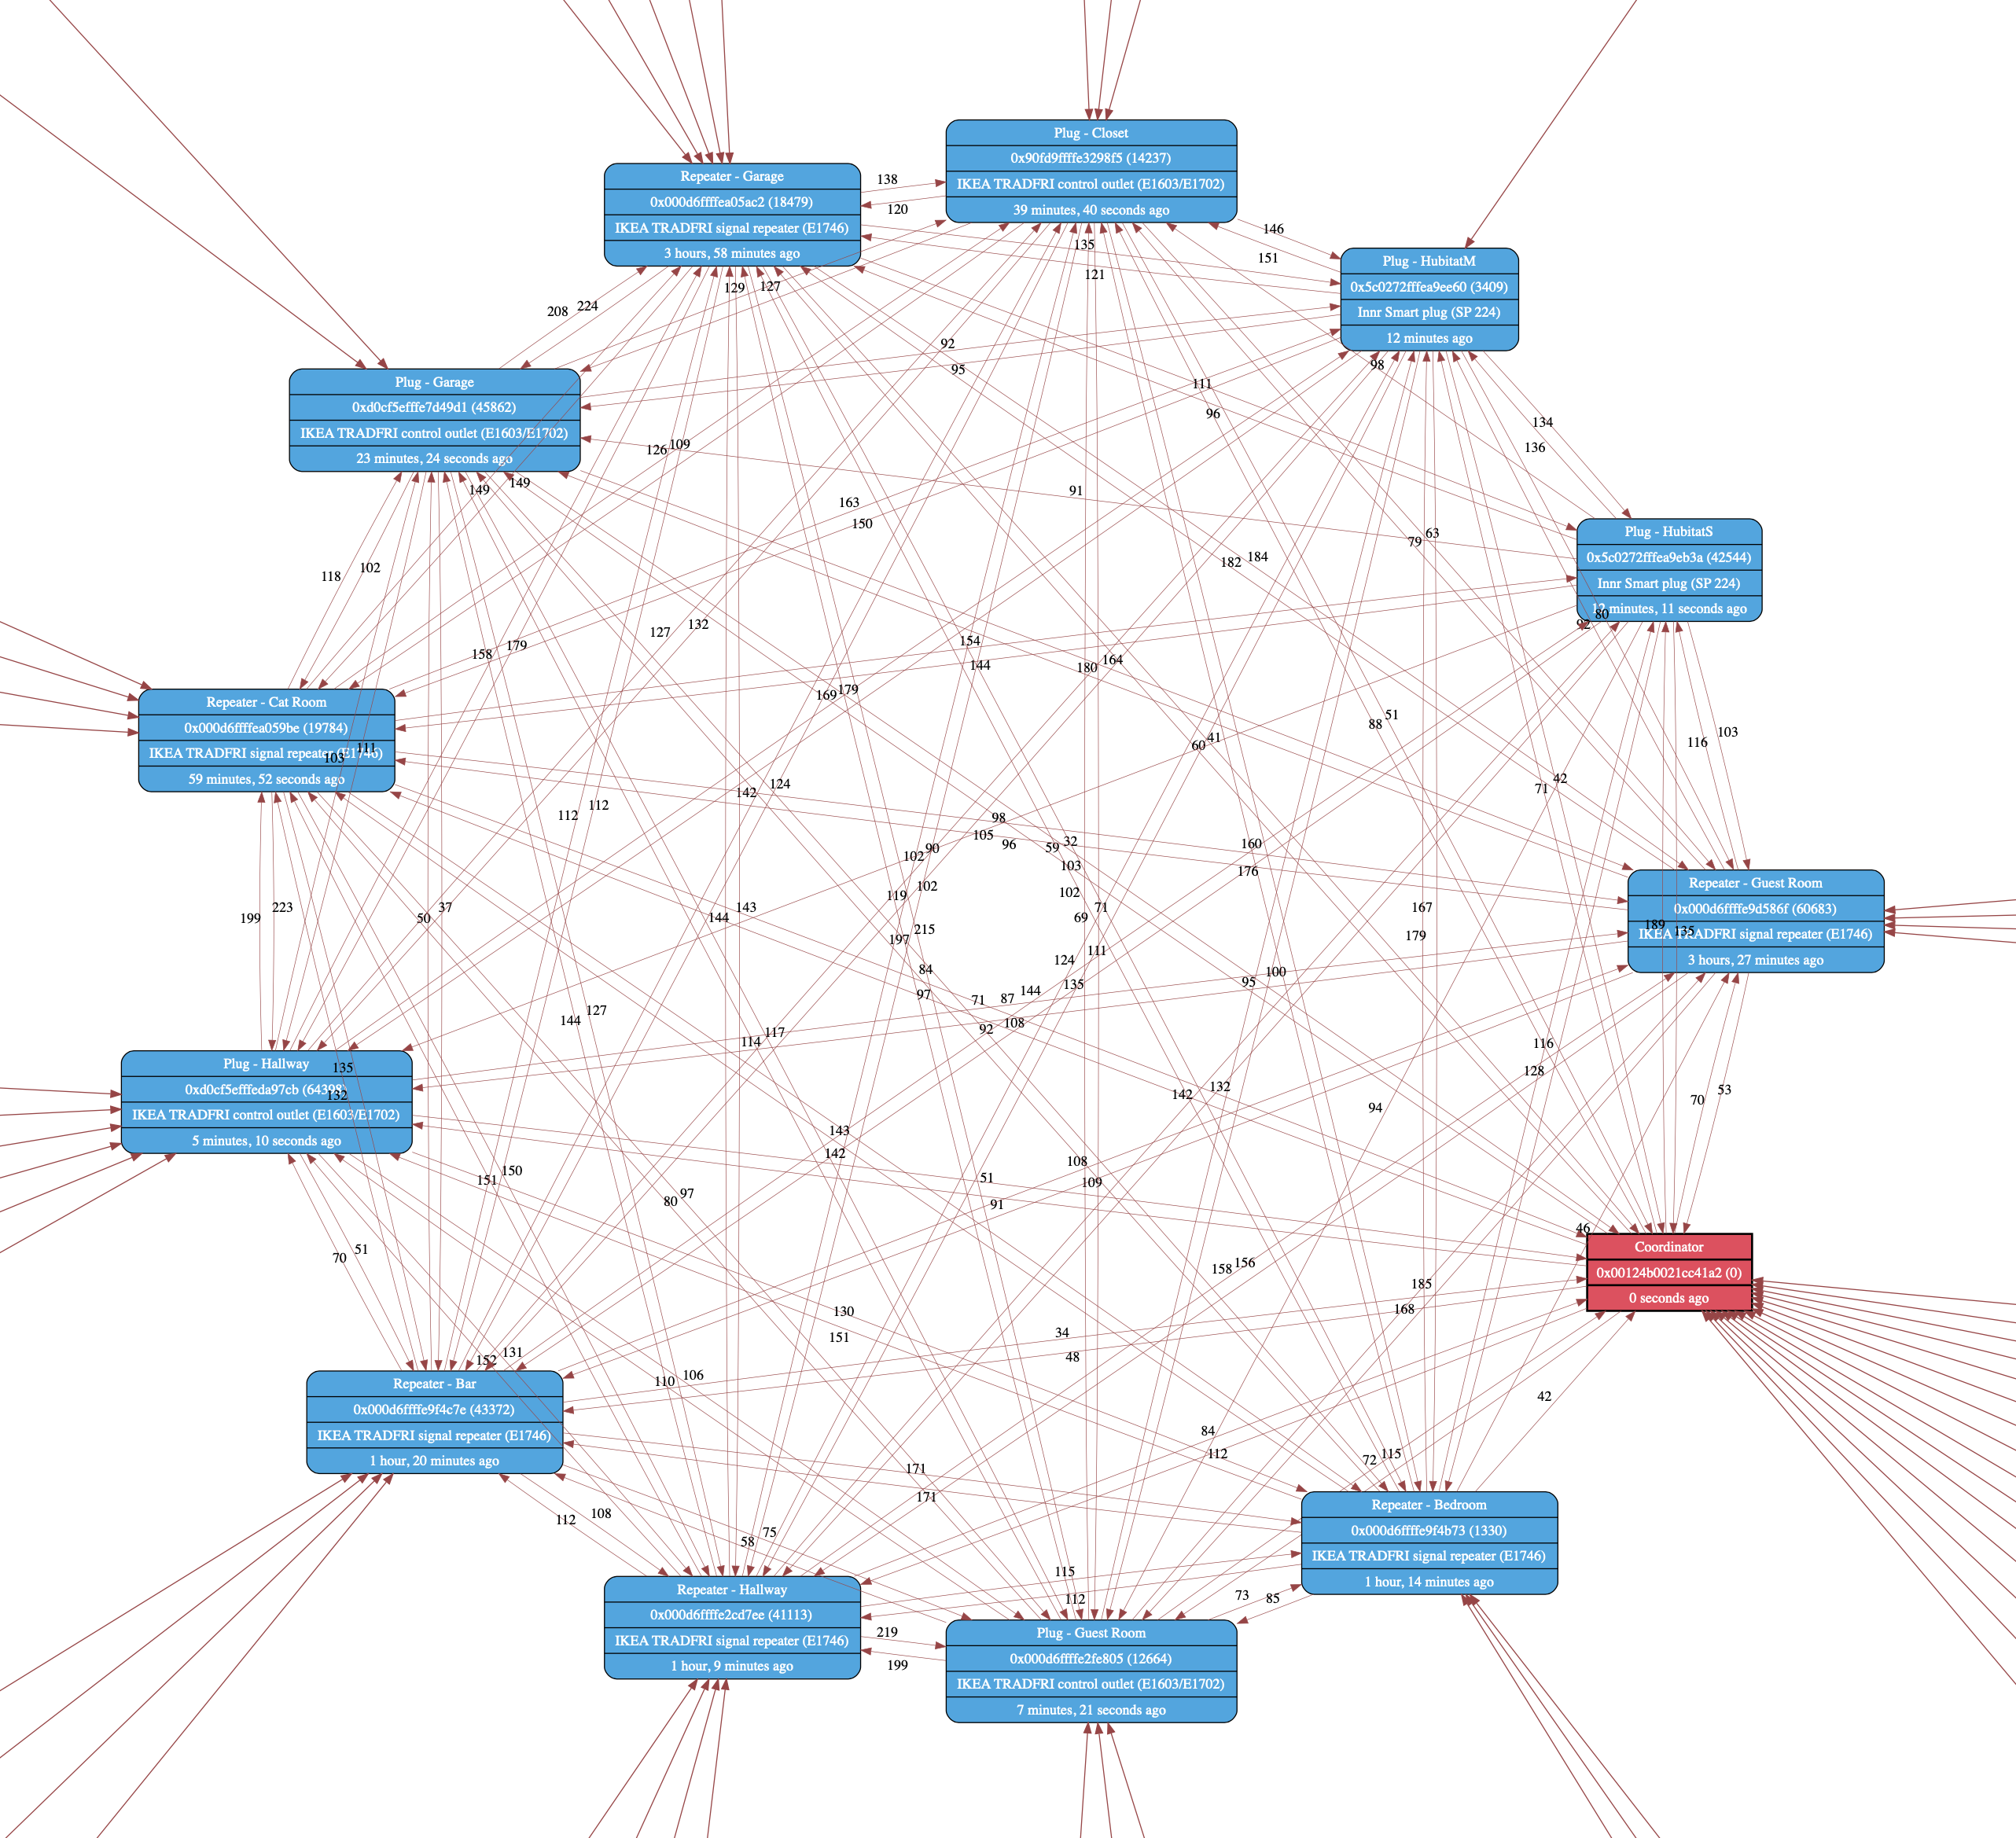
The LQI (link quality) for each link is indicated along the line connecting the two devices.
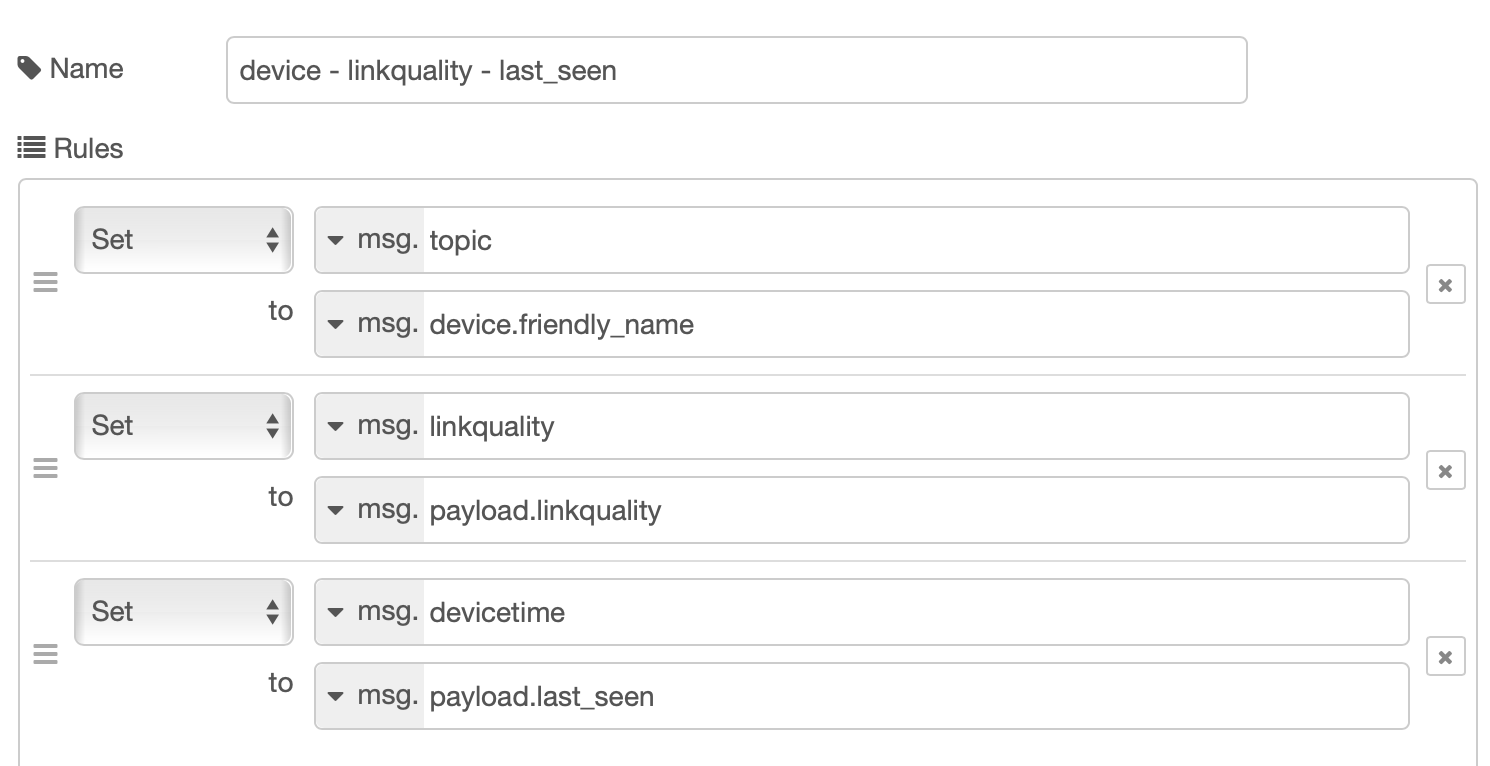
Finally, because link quality and the last time a device is seen by the coordinator are included in messages generated by the “get” node, I use sequences like the one shown below to notified when link quality drops below 30 or when a device hasn’t been seen for more than 4 hours.
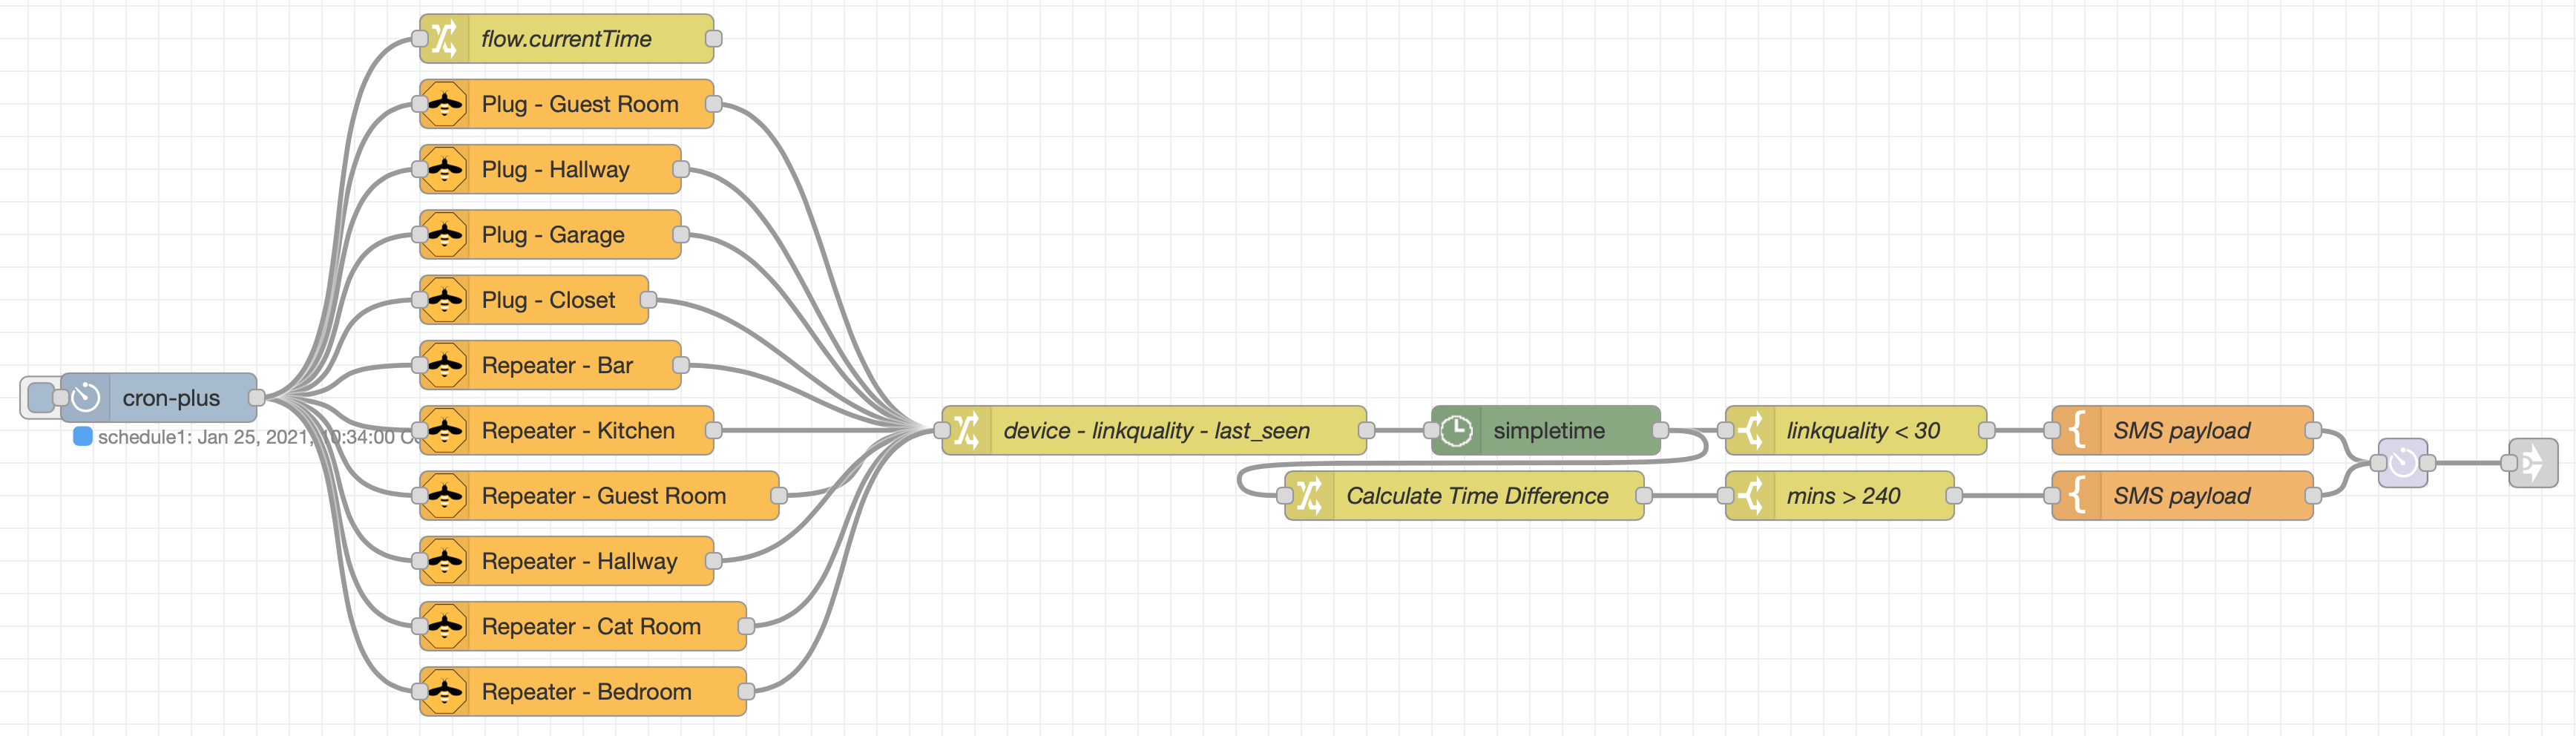
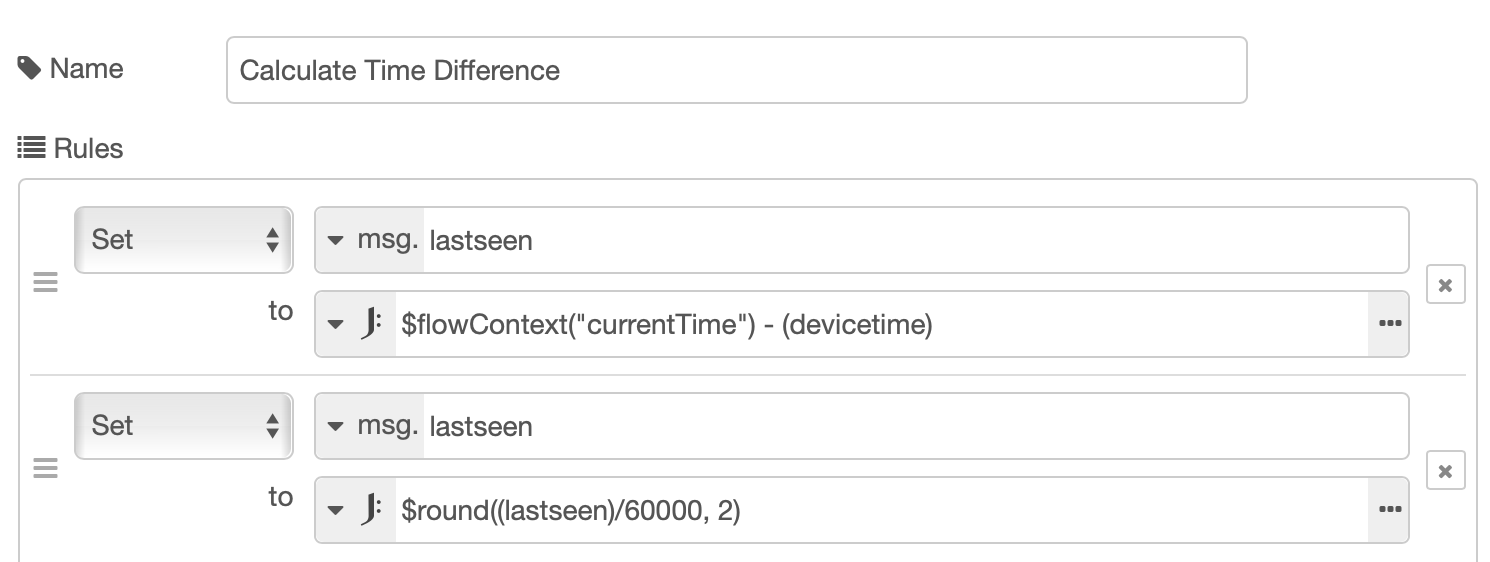
Link quality is sent as msg.payload.linkquality and the last time a device is seen is sent as msg.payload.last_seen as epoch milliseconds.
I calculate the difference in time using the epoch sent by the cronplus node and then divide the output by 60000 to obtain the time in minutes.
So far, in 4 days, nothing has fallen off. It has been very simple to map zigbee2mqtt devices into Hubitat devices that I use in my Node-RED automations. I have removed both Mijia bridges, the Almond 3, and will soon coalesce all the remaining zigbee devices I have on Hubitat onto a single Hubitat. I can’t put these devices, like Iris v2 outlets on zigbee2mqtt because they can’t function as routers/repeaters for Xiaomi devices.
All-in-all, this move was quick and there wasn’t much pain associated with it!