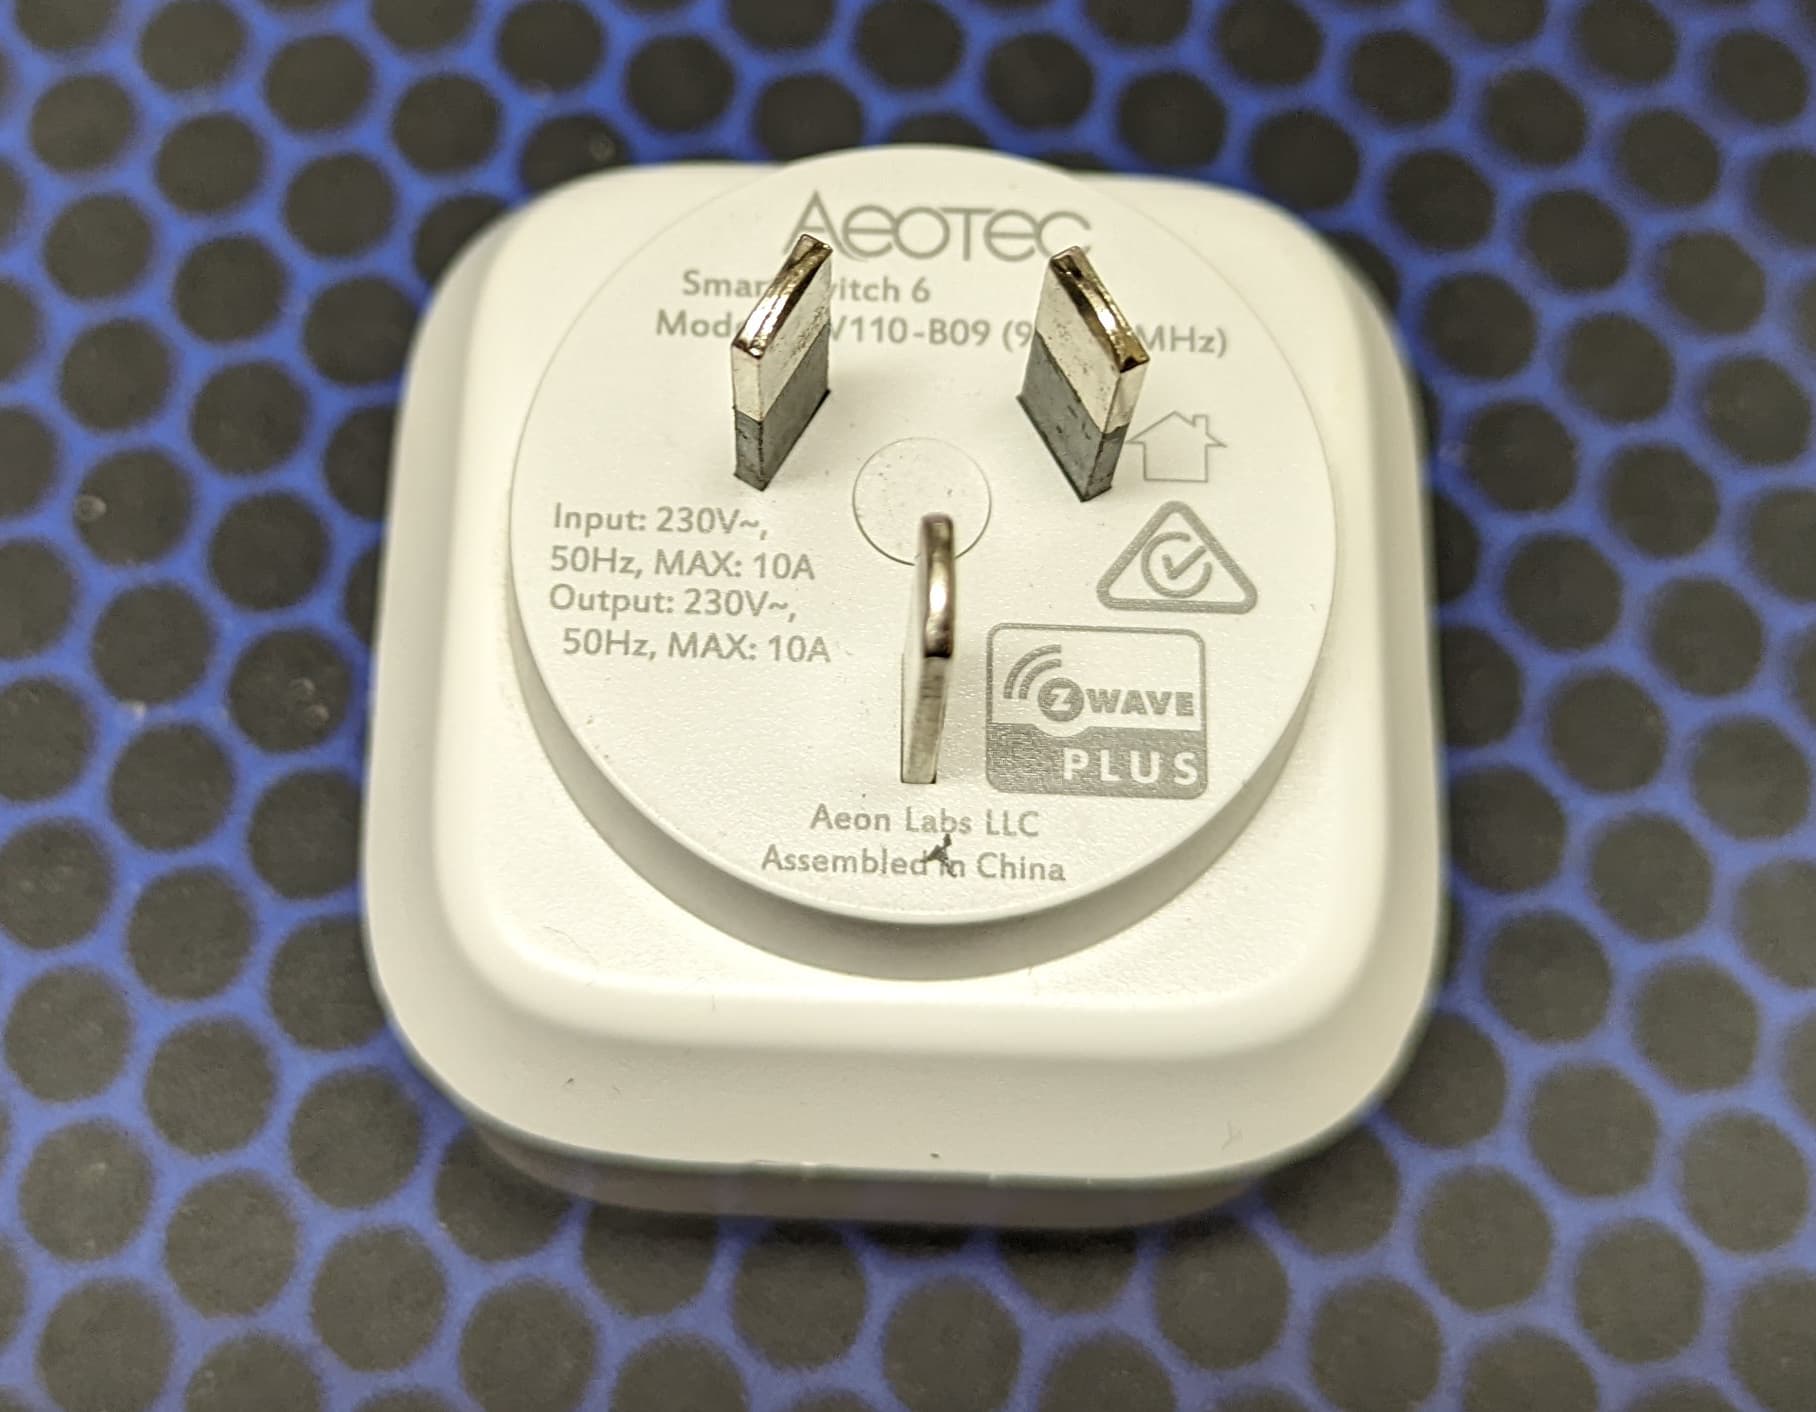
I have 4 Aeotec SmartSwitch 6 devices that have never been very good. One is a first generation unit with the USB power output, and the other three are early generation 2 units. After migrating to Core with the superior monitoring tools, I realised that these devices had been causing problems on my ZWave network for years.
I was going to throw the devices out but thought that I would have a go at fixing them first.
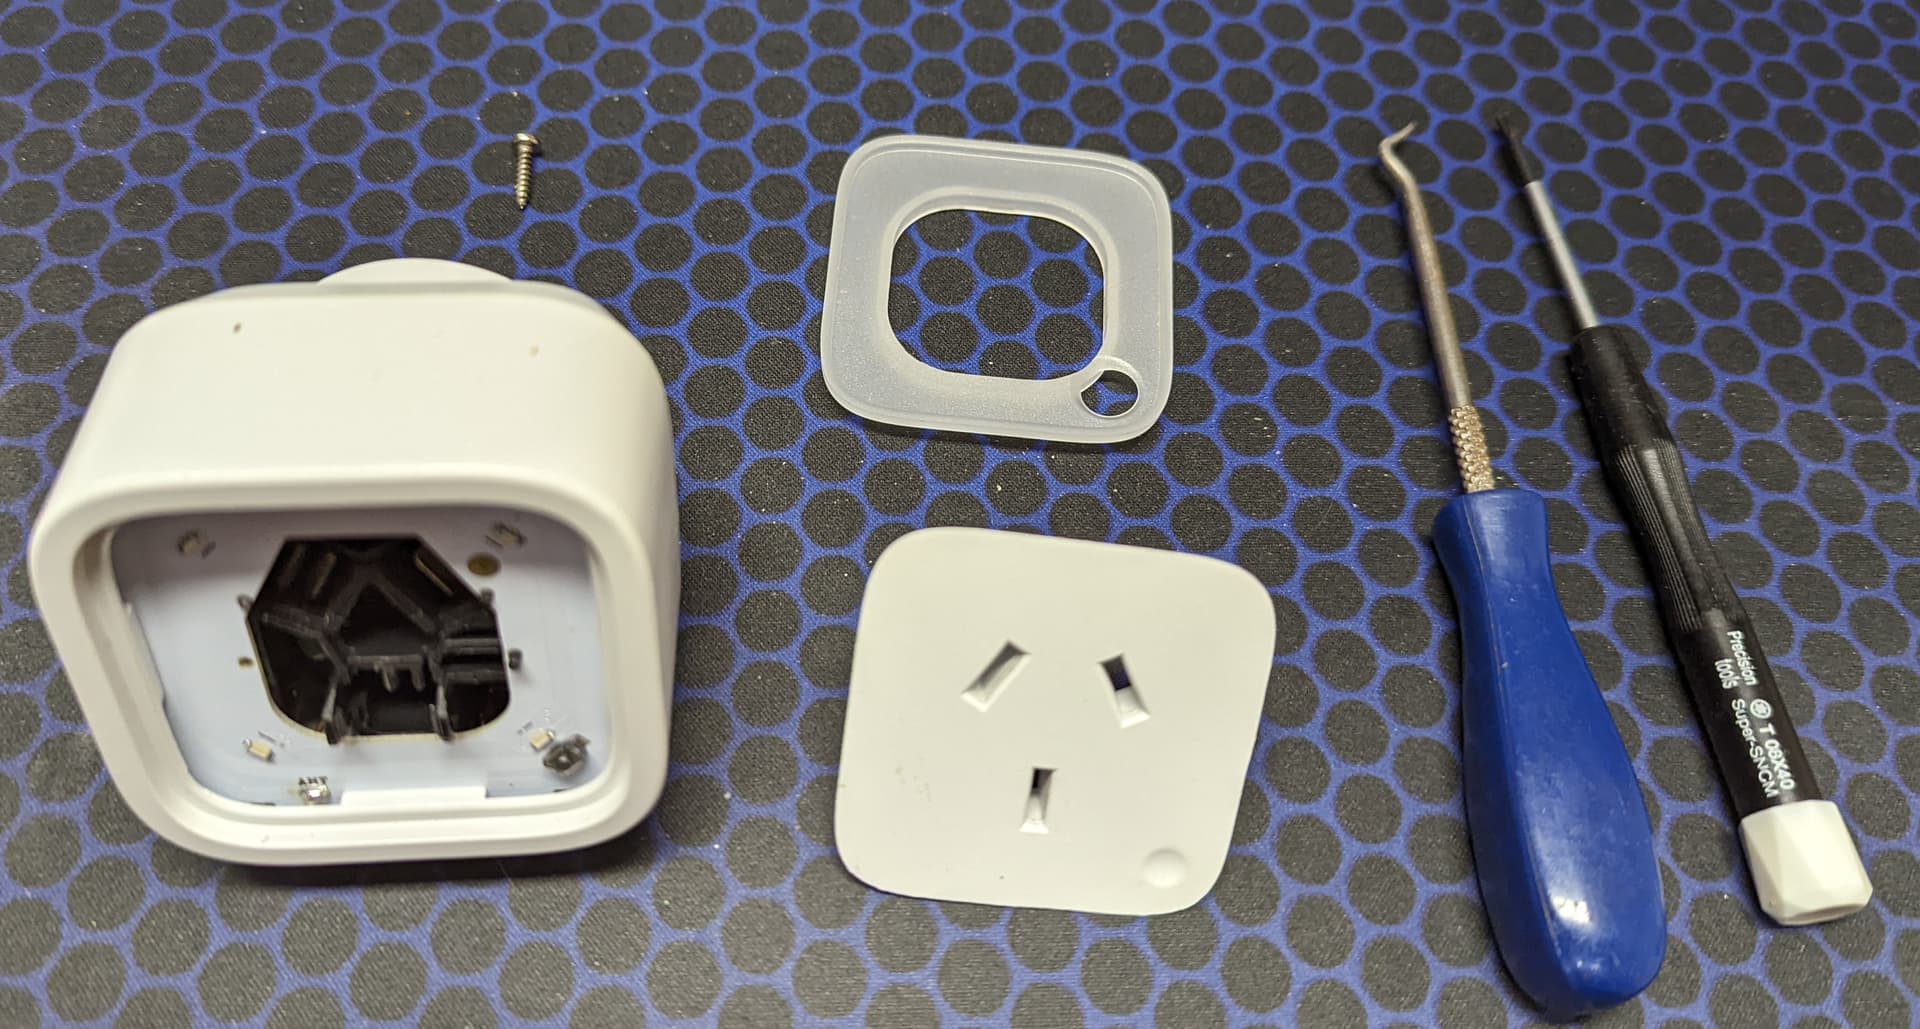
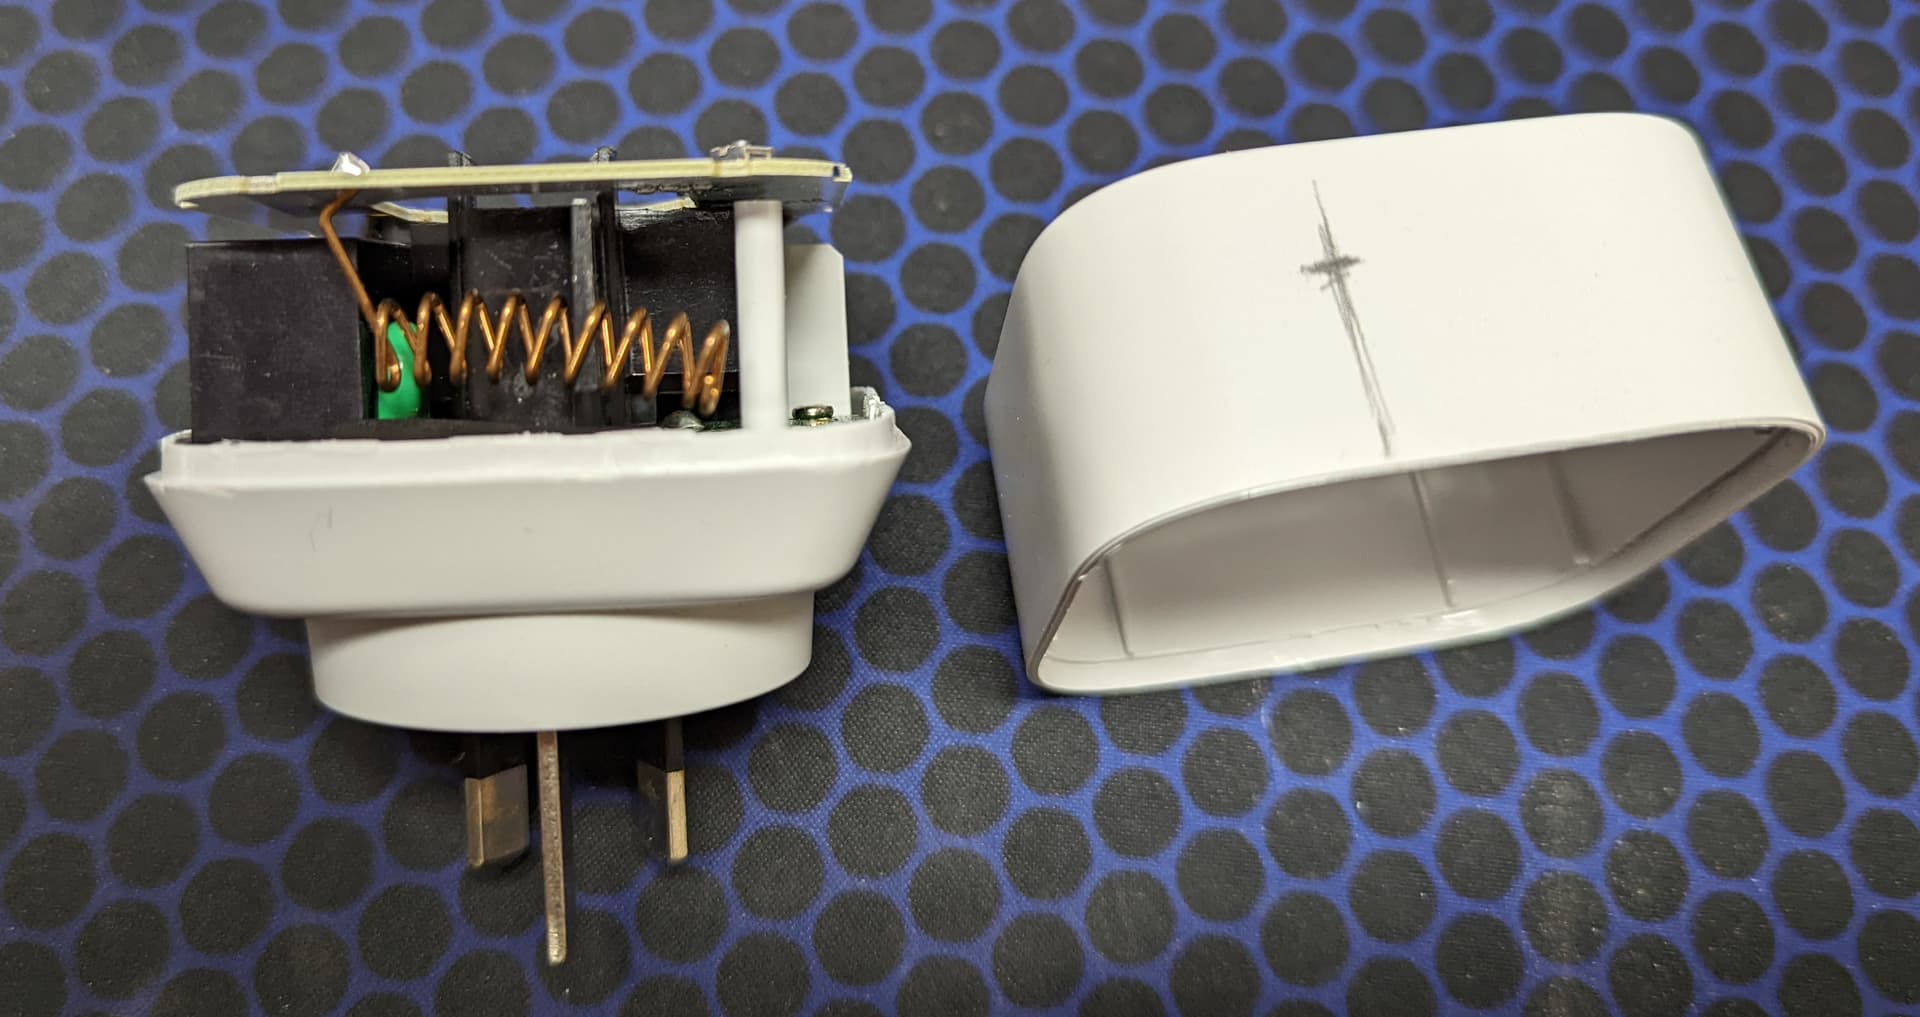
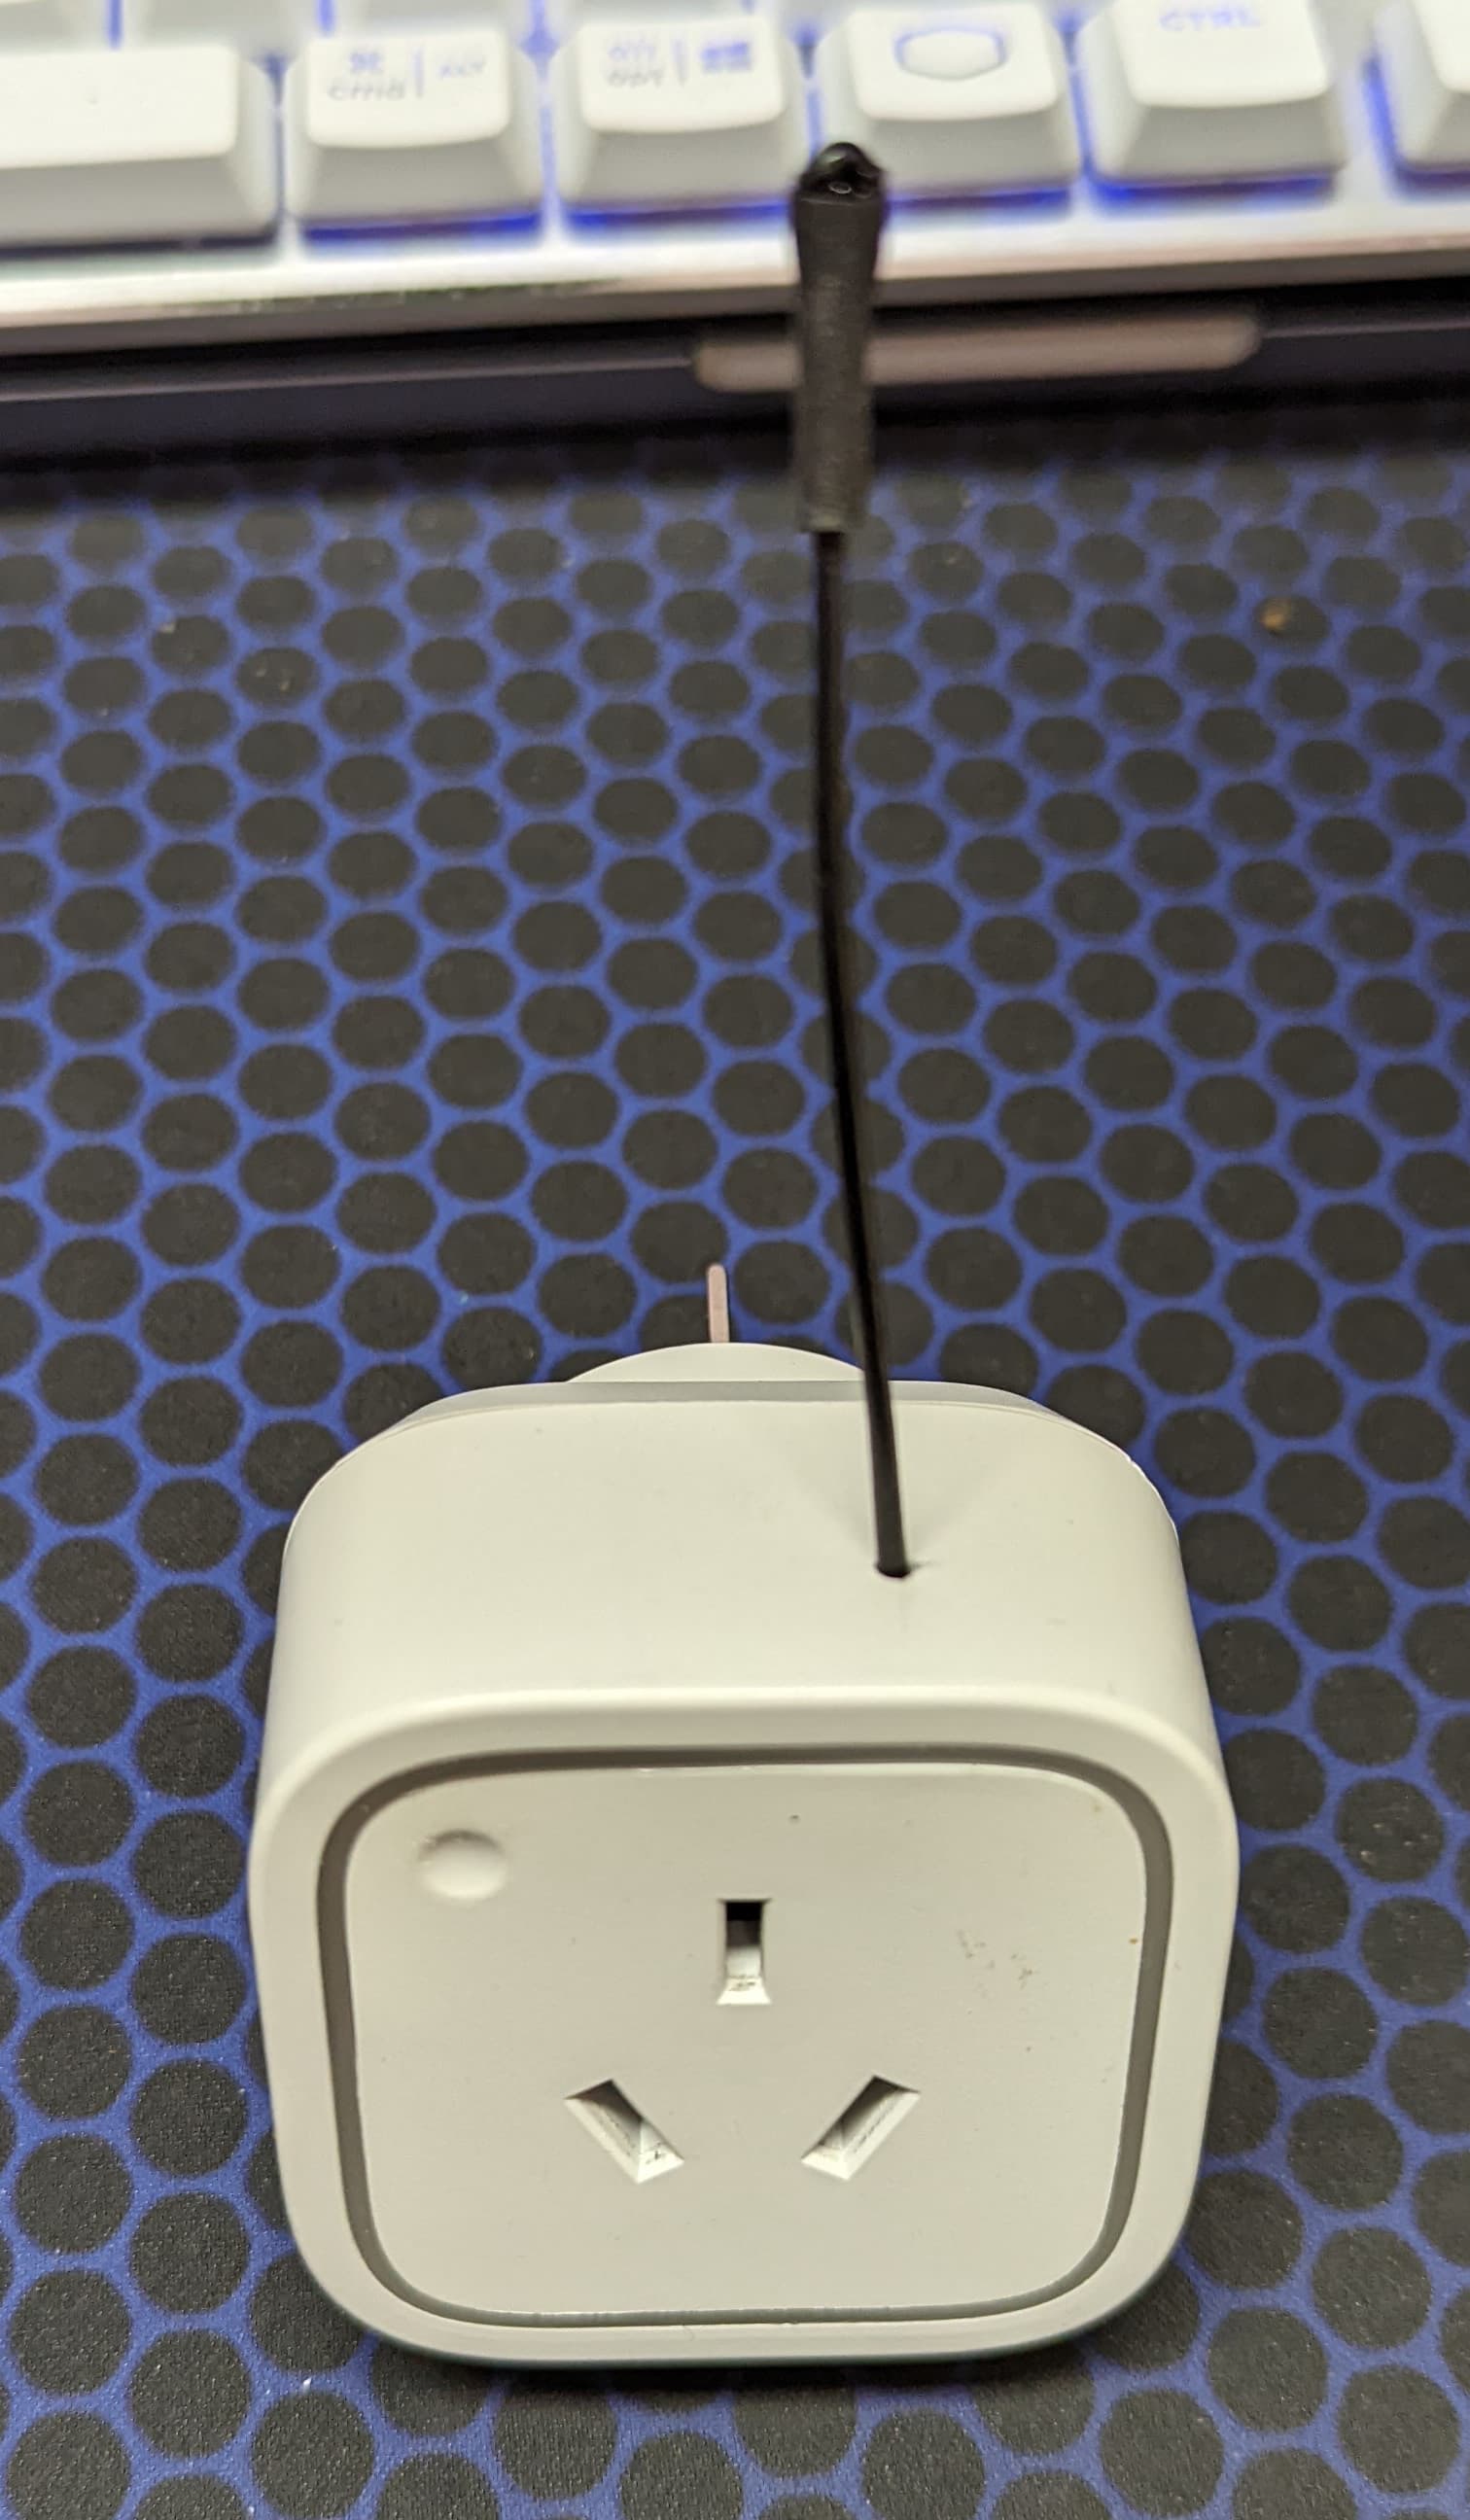
I opened up the case for the newer unit without USB and found that they use a rigid metallic spring as the antenna. Thinking that this might be of poor design, or maybe tuned for the wrong frequencies, I copied the antenna from a Nano Dimmer, which is a simple piece of wire bent at the end to around 76mm long. This is in effect a quarter wave antenna for the 921.42MHz band. This created a smart switch with perfect signal, that stays on the network perfectly. A small hole drilled in the case to pass the wire through and the device is closed again and working perfectly.
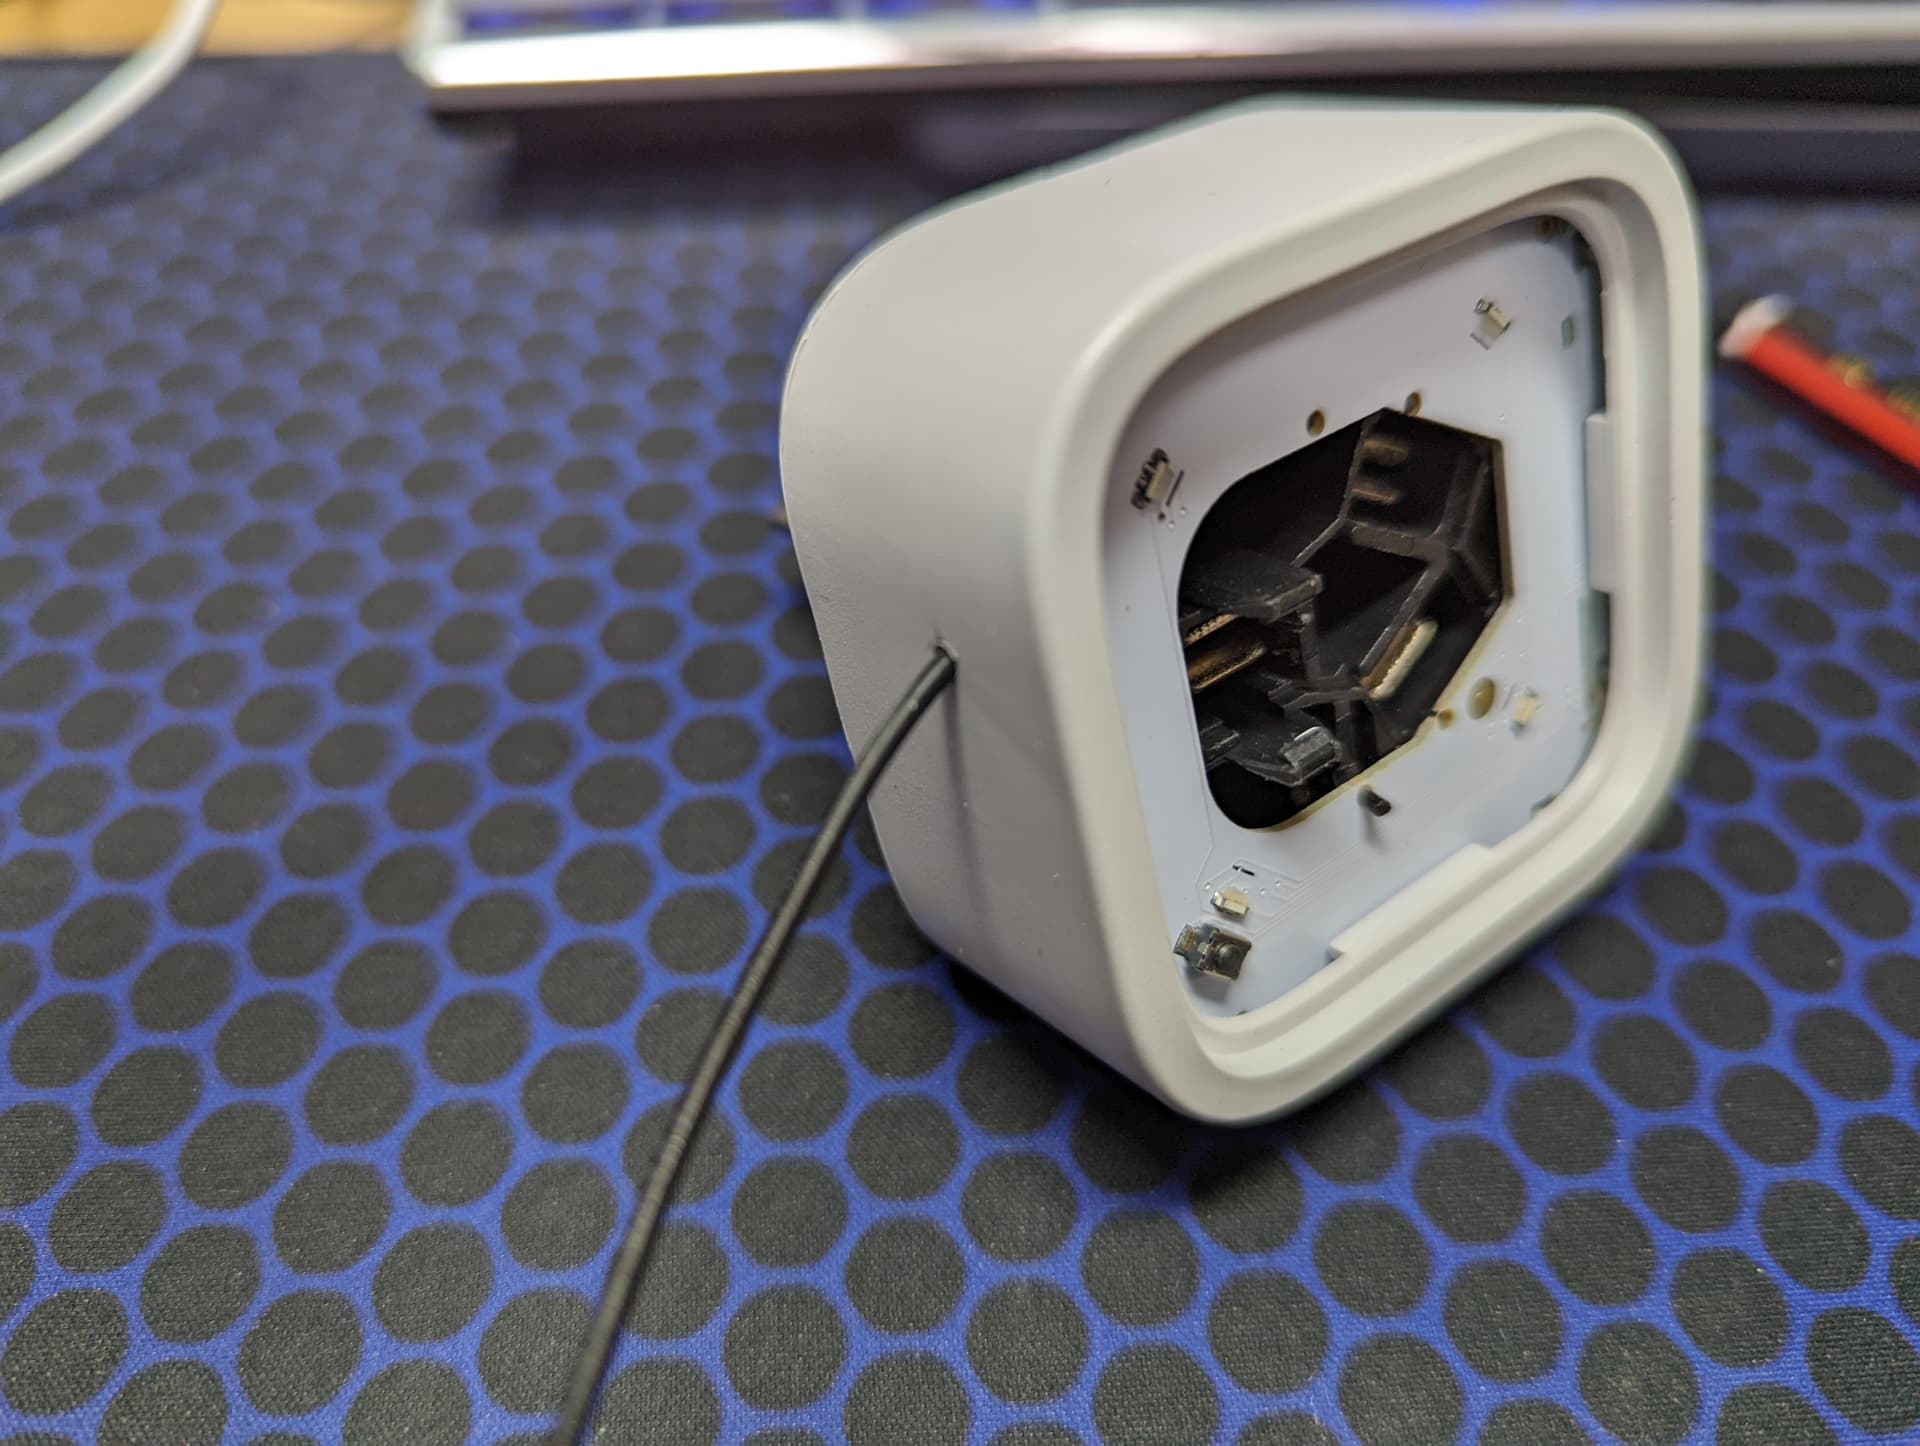
I then opened up the older unit with USB which was a bit more tricky since it is heavily potted, and found that the antenna was a thin flexible PCB and broken off at the base. Once again a small hole for the wire and the device is back in service and deployed where it previously was getting very little signal and often dropping off the network. Now the device works perfectly and does not fall off the network.
This just goes to show that even experienced device makers can make mistakes with their multiple versions, or just not test things properly.