When I was building a new house last year I tried to plan out everything around my electrical and home automation requirements. After many online reviews I decided to select and install Hubitat which then lead to proof of concepting of many different sensors. I found myself trialling motion sensors, light switches, ESP8266 devices such as WeMos D1 mini and Sonoff Basics including Shelly 1 devices etc.
However, as things escalated (as they always can in home automation, right? ![]() ) it really got me thinking about a home alarm system. I had already planned to install motion sensors to do things like turn on and off lights etc, so I decided “hey why not use them as part of an alarm system too!”. This lead me on a journey over to AliExpress and so my search began…
) it really got me thinking about a home alarm system. I had already planned to install motion sensors to do things like turn on and off lights etc, so I decided “hey why not use them as part of an alarm system too!”. This lead me on a journey over to AliExpress and so my search began…
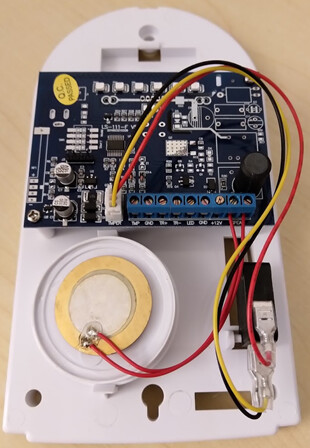
After some digging around on AliExpress I stumbled across many different sellers that all appeared to be selling the same 12v siren shown here.

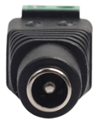
I decided to place an order and about 3+ weeks later the siren arrived. In addition to the siren I also started to think about my power options for it. Initially I just considered running power and using a 240v to 12v power adapter but I had a thought, running CAT6 cable would be better as it would also be protected behind a UPS, this was an additional benefit and would be a much cleaner solution too. After some further digging on Aliexpress I found a 48v to 12v POE adapter as shown here.
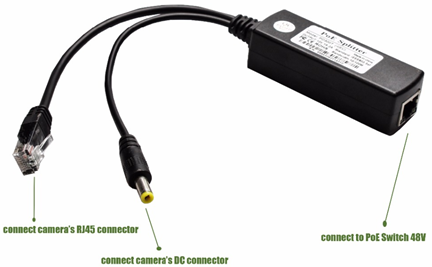
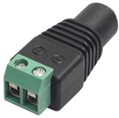
To keep the solution as plug n play (simple) as possible, I was able to locate a 2.1 x 5.5mm DC barrel power connector that fit perfectly on the end of the 48v to 12v POE adapter here.
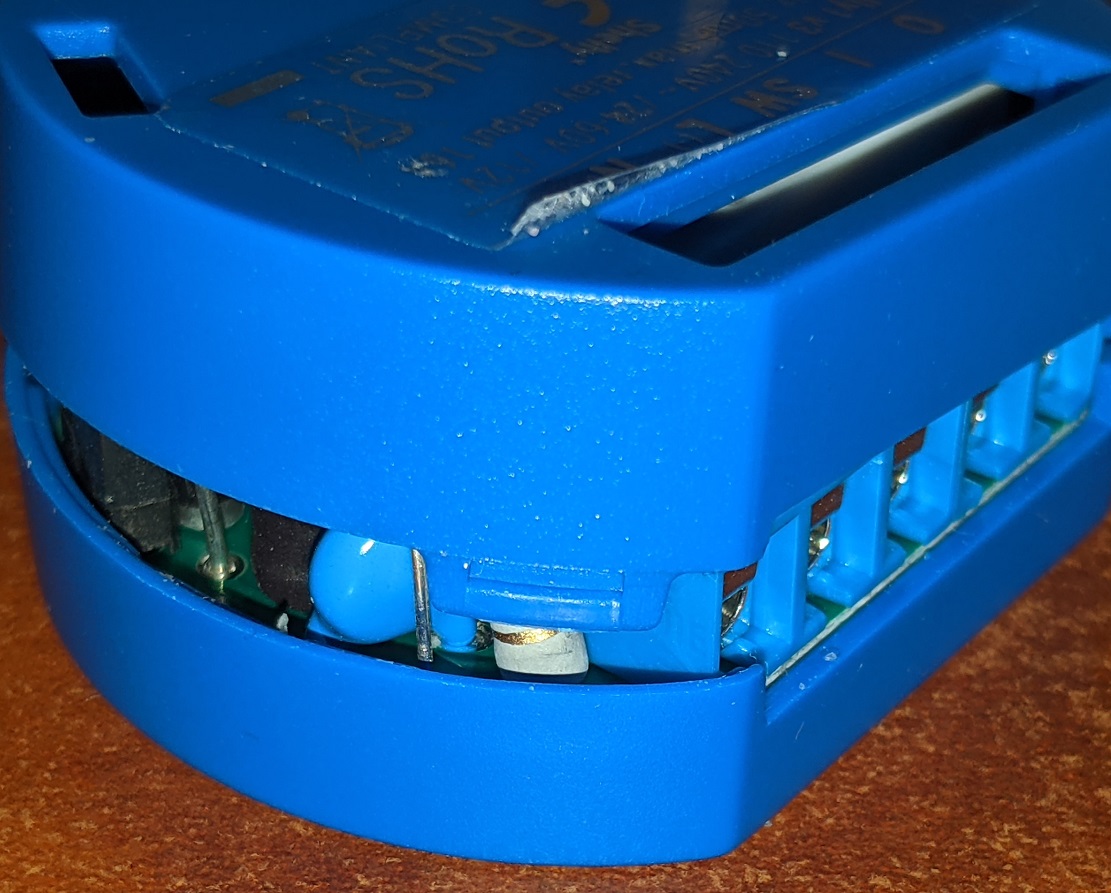
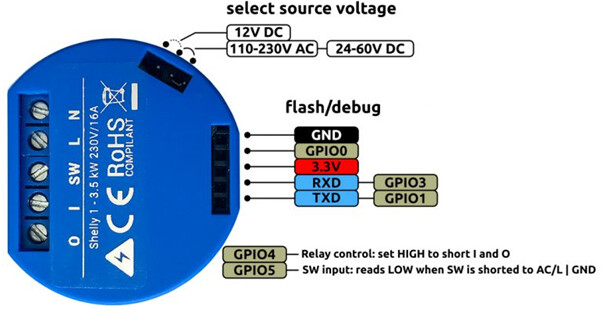
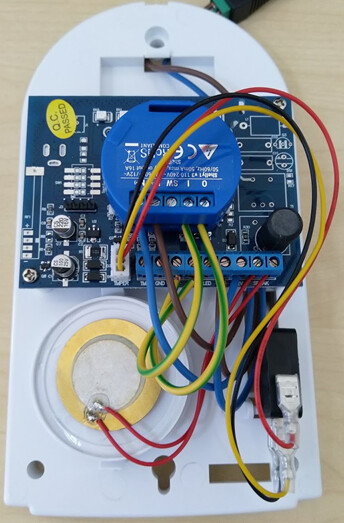
After some more weeks of waiting for parts I was finally ready to begin. I had four components in total. The main being a Shelly 1. Note I had to switch from the default 110-230v AC to 12V DC using a tiny jumper see below
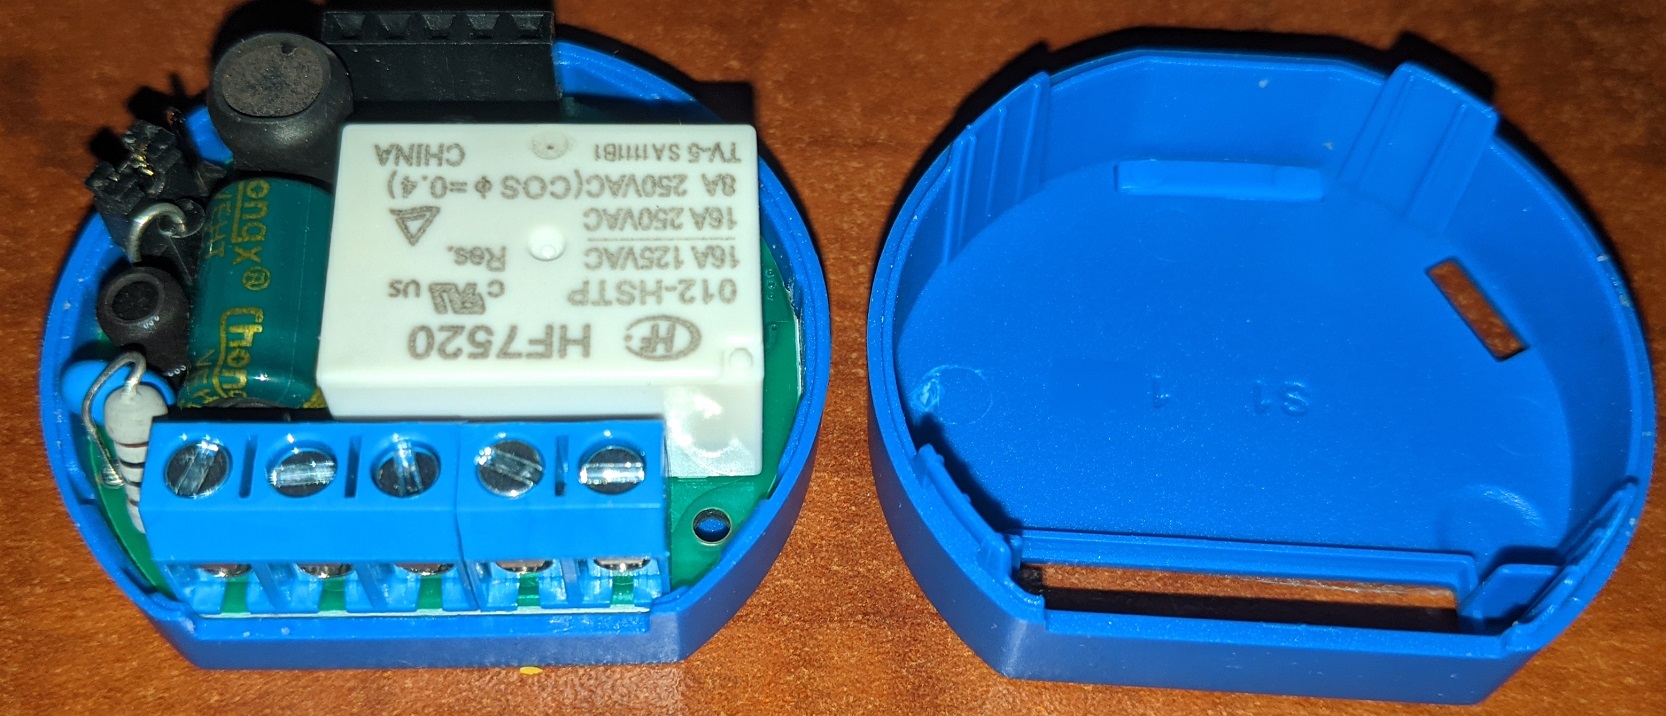
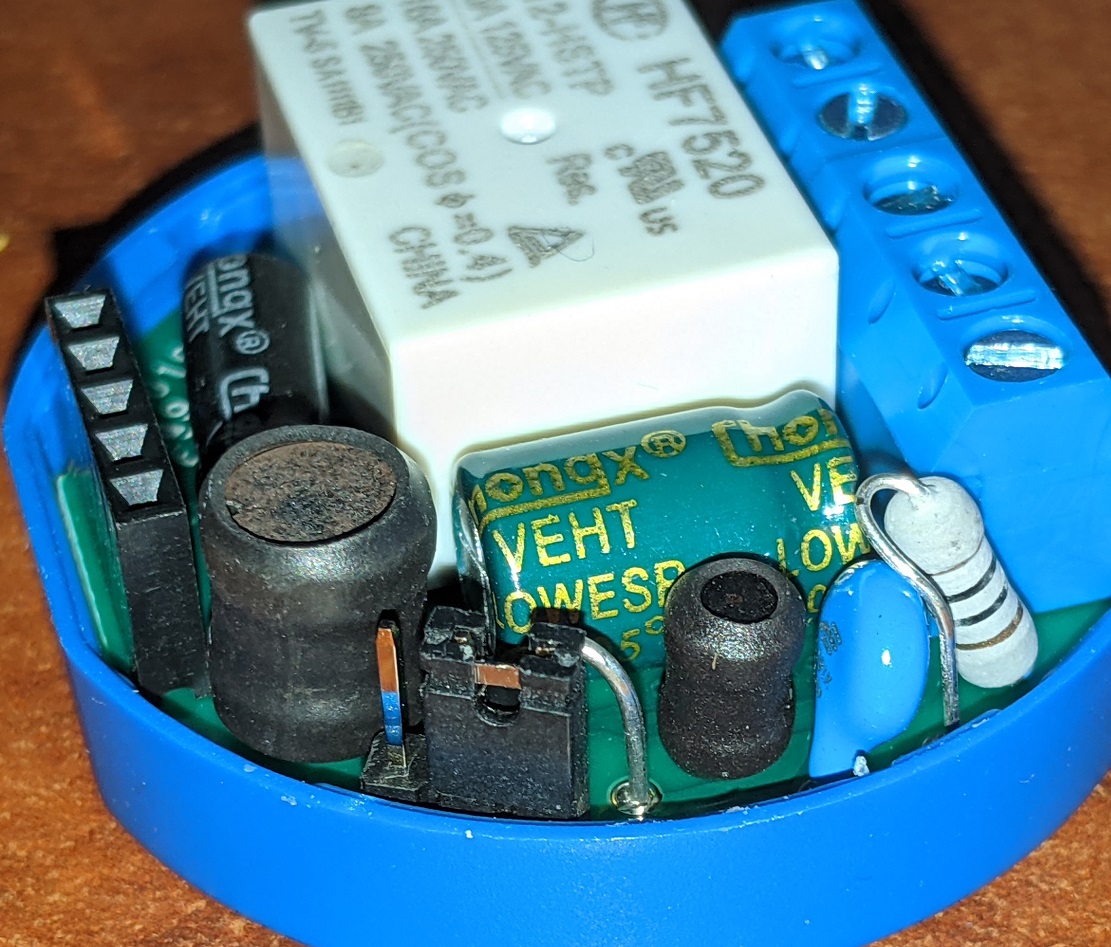
With the siren POE adapter and 2.1 x 5.5mm DC adapter in hand I initially started by opening the siren for a peek. When you initially open the siren you notice the tamper switch on the right-hand side and the siren (which is very loud!!) on the left. The system itself has a lot of screw inputs so it was just a matter testing and effectively bridging the connections to see which ones I required to connect to the Shelly.
After a few attempts I found that TR+ and TR- was all that was needed to turn on or off the siren. At this point I just had to wire the Shelly 1 to the siren in the follow configuration:
- N+ on the Shelly 1 to the +12v on the alarm
- Note: you do need to split the wire for the Shelly and to the 2.1. x 5.5mm DC adapter for power. I used a small wiring connector which is hidden under the board (sorry I missed that picture).
- L- on the Shelly 1 to the GND on the alarm
- Note: you do need to split the wire for the Shelly and to the 2.1. x 5.5mm DC adapter for ground. I used a small wiring connector which is hidden under the board (sorry I missed that picture)
- 0 on the Shelly 1 to TR+ on the alarm
- I on the Shelly 1 to TR- on the alarm
And that’s it done!! I now had a Shelly based WiFi alarm with siren and strobe capability cool. I personally installed this into Hubitat but really you could use any home automation system that you preferred. Also, this does not affect the Tamper switch it still works exactly as designed (trust me my ears bled when I learned that by accident!! ![]() )
)
Anyways thank you for taking the time to read about my project. I can happily say that this is still running well even after 12 months since being installed outdoors in the elements. Please feel free to reach out if you require any further details about this solution as I would be more than happy to answer them.