Outdoor LED's

Since it’s a rainy day and I’m basically playing nurse this weekend, I decided to set up some lights for our pergola. Now, I did some preordering for the occasion.

I ordered these from Ebay as they aren’t available on Amazon for some reason.

LEDENET Smart WiFi LED Controller 5 Channels Control 4A5CH CW/WW RGB RGBW RGBWW LED Light, Timer Music Group Sync Controller: Amazon.com: Tools & Home Improvement

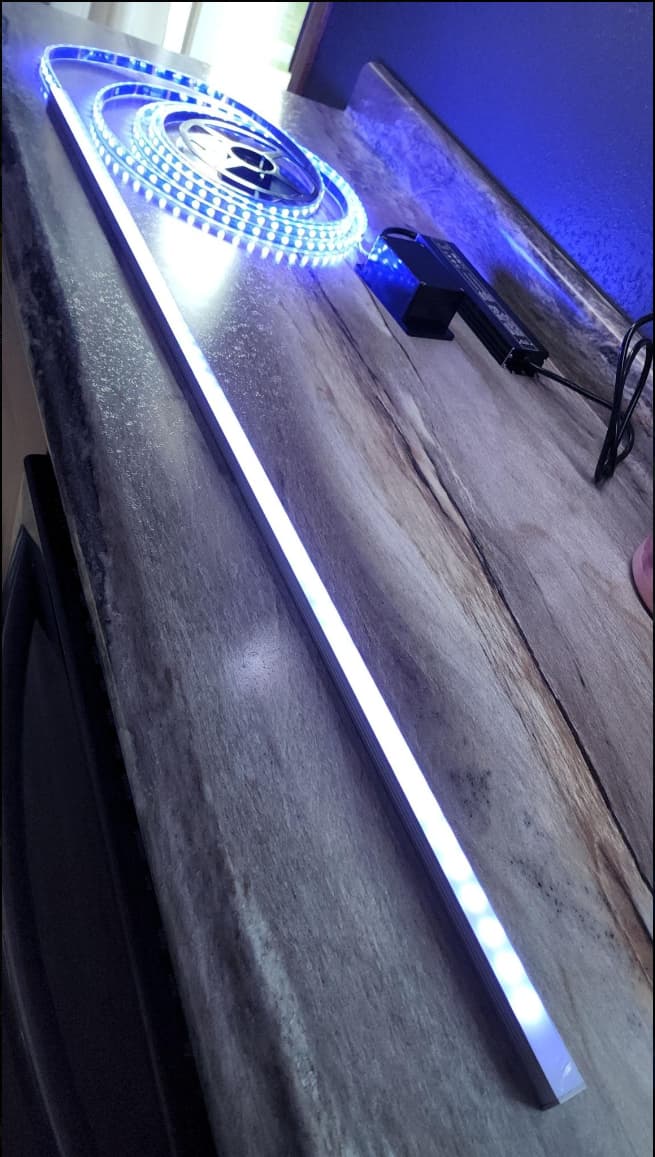
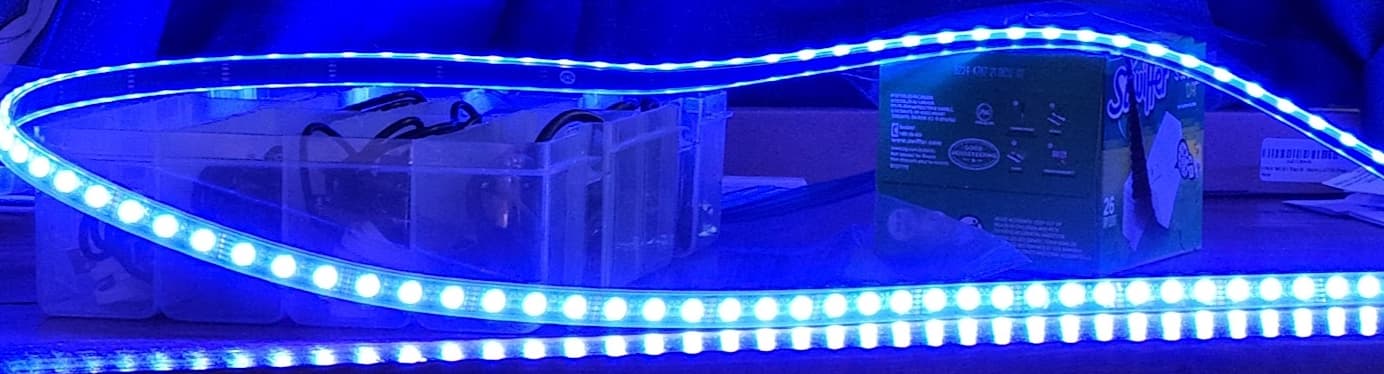
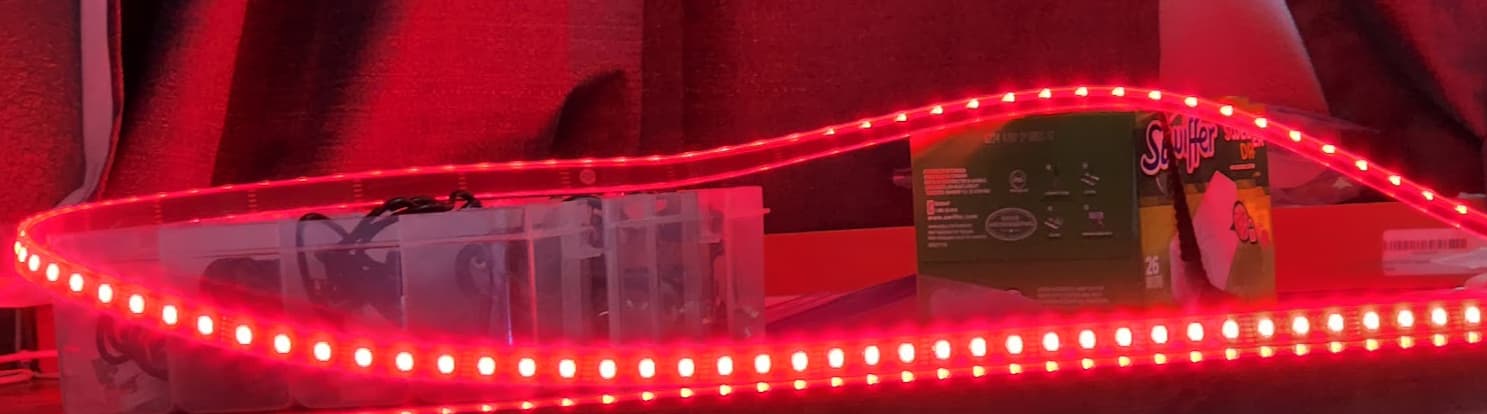
BTF for the lighting. I have to say. I wish all of my led’s were BTF. They’re beautiful.

Amazon.com: BTF-LIGHTING 5050 RGBW RGB+Warm White (2700K-3000K) 4 Colors in 1 LED 5m 16.4ft 60LEDs/m Multi-Colored LED Tape Lights IP67 Silicone Tube Waterproof Black PCB DC12V For Bedroom Kitchen Home Decoration : Home & Kitchen

Outdoor transformer was the most expensive, but I’m happy with it. Seems solid.

LED Driver,LED Power Supply with IP67 Waterproof Rating,LED Transformer,Low Voltage Transformers,120VAC to 12V DC Converter Constant Voltage LED Switching Power Supply 150W with 3-Prong Plug 4.5feet - - Amazon.com

Junction box to house the controller.

Zulkit Junction Box ABS Plastic Dustproof Waterproof IP65 Universal Electrical Boxes Project Enclosure with Fixed Ear Black 3.94 x 2.68 x 1.97 inch (100 x 68 x 50 mm)(Pack of 2) - - Amazon.com

Other tools and supplies:
Hot glue gun
Solder
Clear fast dry caulk

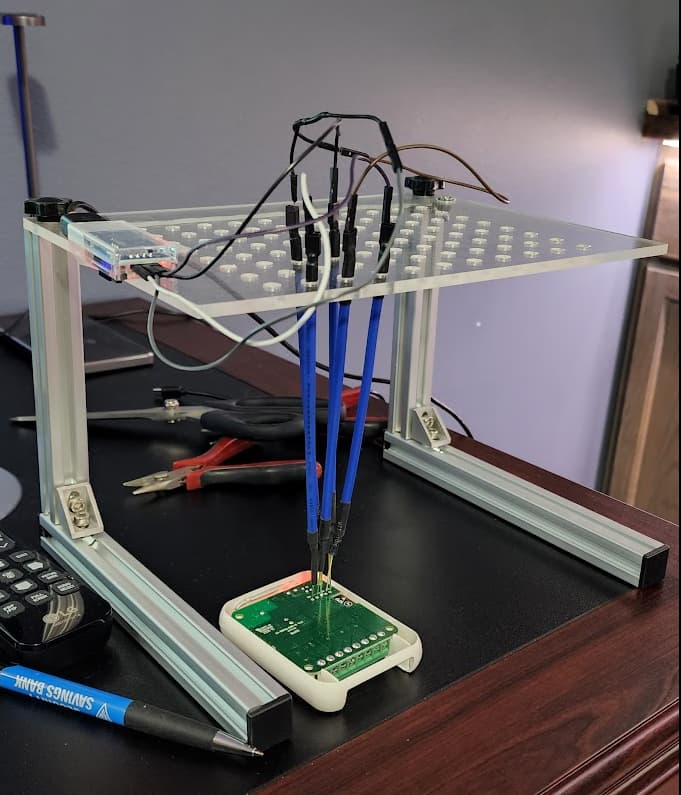
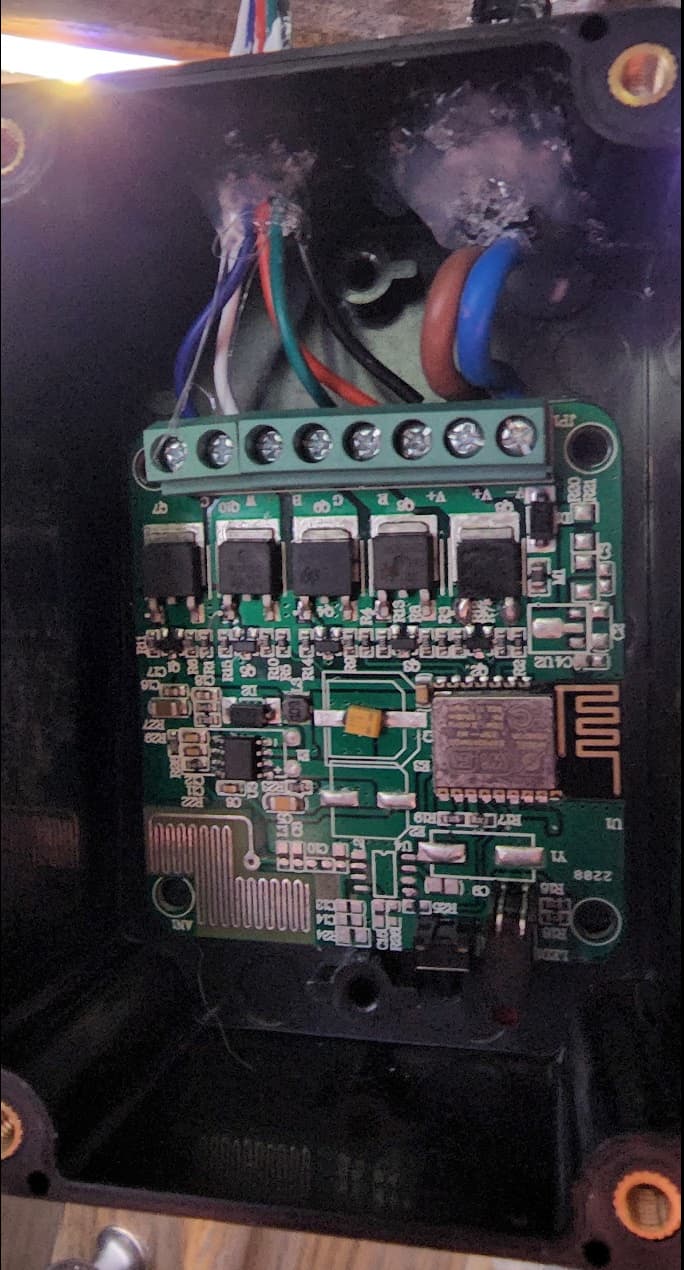
First thing I did was set up my controller by flashing it with ESPHome. I have a jig, which is overkill for this application as you can literally just use pogo pins to do this. I did this with dupont wires before. Looks cool when friends come over, though. :grin:

I’d be happy to share the config if you’re thinking of completing a project similar. (I’m going to take on holiday lights with this type of setup)

After it was flashed I connected the components and tested all of the colors. OH are these pretty! I hope they look just as good outside!

Next I drilled the hole for the power source. Measure and use a drill bit.

I used a soldering iron to burn a thin slit for the LED wires to go through. It was a tight fit and that’s what I was looking for.

I placed the power source chord and hot glued that in place first. It’s an awkward heavy cable, so I got that placed first. Sealed with caulk. Let it sit for a bit to set up.

I threaded the LED wires through and then tinned them. Connected them to the controller and placed the controller. I also connected the power source.

Why did I tin the wires? It makes it easier and sturdier to do so. You don’t have to. But I did.

After I got everything in place I used hot glue to hold the LED wires in place and used clear caulk on the outside to waterproof. I wasn’t concerned with looks. It’s all in the inside.


Once it’s dry and I’ve tested, I’ll get it installed outside. Then it’ll be time to write the rules and wait for the sun to go down. I’ll post more as I go.

4 Likes

Another thing that you can use to make stranded wire work better in screw terminals is to use crimp on ferrules:

The metal tubes really help the strands from being damaged by the screws (on direct screw terminals, which I realise that these are not) and the plastic collars provide excellent strain relief. Tinning can be a bad idea in high vibration environments, which I realise that this is not of course.

Good to see that these flashable controllers are easy to come by. I am thinking to rework the outdoor lights on my house, but I was actually looking at something more like this:

Where the LEDs are individually addressable, then use a custom esp32 controller that I can have some set patterns, or fully custom patterns as I feel like.

2 Likes

@jchurch just sent me this link. I’m seriously considering this for the future!

(2) DIY Permanent Holiday LEDs - It keeps getting easier! PermaTrack, Pixels and WLED - Christmas Lights - YouTube

With these.
50pcs/100pcs 12mm WS2811 IC RGB LED Pixels Module Light Black/Green/RW – BTF-LIGHTING

1 Like

Looks like we are all thinking the same way then! Those are the same as what I sent, just without the resin balls.

I also looked at straight LED strip with WS8211 or similar but the power consumption of even the lower density units is remarkably high, even with the 30/m versions (there are also 60/m and 120/m which are absurd). These cable style are a lot less dense and perfect for decorative use outside.

2 Likes

Agreed. I showed the video to my husband and he (being anti Christmas lights) though it might be a cool thing to do. Him. Yah. I know!

That Permatrack looks pretty awesome actually. Might try something similar locally. Not worth importing from USA obviously.

2 Likes

Oh so now you have lost your staunch refusal to touch addressable leds?

This is literally what I suggested you do for outside lighting over a year ago!!! :stuck_out_tongue:

2 Likes

TBH It’ll be next year before I consider it. But yes, I may be wavering on the topic. But my refusal might not be “staunch”. It’s still a LOT of work and time that I might not have. Unless you wanted to come hang them?

Your house would be a dream to do compared to mine… you have nice angles and run areas on your house, mine is just a giant box with nowhere to hang light unless you have a 20ft ladder and aren’t afraid of the main power lines :face_with_thermometer:

Or heights

1 Like

Received my channels tonight.

Muzata 10Pack 3.3FT/1M Silver LED Channel System Spotless U Shape with Frosted Milky White Diffuser Cover 18x13 mm Wide Aluminum Profile Track for Waterproof Light Strip Light U103 1M WW, LN1 LU2 LP1: Amazon.com: Industrial & Scientific

These will house a strip that is inside a waterproof sleeve. I’m not 100% impressed with these, but they’ll work. The parts are a bit loose, but I’ll make them work. They do diffuse the LED’s nicely. A little adhesive will keep things in place. No harm no foul.

I’m thinking we’ll have these hung by the weekend. Hubs is still recovering from surgery, and this is a two person job. I need someone to hand me parts while I run the drill. (Not allowing him on a ladder)

4 Likes