HA Dashboards for wall mounted displays (and more)

After running Kiosker Pro with smartly for a LONG time, I’ve been on the search for a good alternative for a while now. Finally I figured out how to tame Home Assistant dashboards in a similar way, so I wanted to share my findings as well as my very limited expertise with the group.

“Nested” horizonal/vertical ‘cards’ create endless placement options within a contained space.

Yes some of the fine tuning, and glitter, needs to be done in YAML code (think CSS edits), but the basics can all be done in the visual editor. The above dashboard is 1 big card, with many cards nested inside.

It begins with the a Horizontal Stack Card shown below, followed by 3 vertical stack cards.

The top line I consider “Columns” 1, 2, and 3. Above I have column 2 selected, and “Row” 1 is being shown. Inside row 1 there are 5 button cards. These 7 items make up the top row of buttons in the center of my dashboard.

While the “preview screen” gives you a basic idea of what is happening, take it with a large grain of salt. You’ll only know if final outcome of your edits when viewing it on the intended device, preferably at full screen if that is the end goal.

Below I had to drop my browser to 75% to show all the nesting that makes up the small buttons at the bottom of Column 1.

Following the numbers down would be (in my own words not official anywhere) Column 1, Row 3, (horizontal card), Section 3, Sub column 1, Button 1 :yawning_face:

Without going into too much more detail I just wanted to throw this out there as an option. The HA forums and options can be VERY overwhelming. Doing my best to apply the smartly knowledge imparted to me by @spelcheck on HA dashes I offer my limited “expertise” to any OLL member trying to find a new dashboard alterative.

7 Likes

Great write up… I definitely have some experimentation to dip my toe into…

Honestly… Who doesn’t… :wink:

1 Like

Your too kind. Since your interested I’ll elaborate/update a bit

I rebuilt the basics in visual editor only this morning since my first go was the usual hack n’ fix job. In doing, so I made this small edit to the above that should help.

Once the 1st four cards I’d recommend sticking 2 button cards in each one to get the basic idea, and you should have the below.

By default everything will be in the middle. Click the 3 dots top right > edit dashboard > pencil top left > Panel (1 card). That makes it full screen.

More later…

2 Likes

How much later… :wink:

Lol… Great work… happy to see people playing in this space… thankyou.

Don’t want to scare people off till you reel a few in :laughing:

Happy to help clarify, or answer any questions if people get stuck. Once graduated from learning the basics of this layout format one may want stuff like CSS in a given tile, pop-up tiles, links to other apps, embed iframe pop-ups (windy.com), animated backgrounds, no left or top border… All that requires YAML edits either per card, or to the main dash YALM. But don’t worry this is all done from the HA UI no need to download/edit/upload text docs.

That reminds me…

Backup your dashboards!! Once you have something you like, it sucks having to rebuild it unintentionally. Backing up the entire dashboard is easy with YAML (just like JSON in HE).

Click 3 dot menu (top right) > edit dashboard > 3 dot menu again > Raw configuration editor
imageimage

Select all the text there, paste that into your favorite text editor, and save it somewhere safe. If needed it can be used to restore, or duplicate the dashboard (good for hacking it up in a test environment, or sending to others)

1 Like

Wow, I haven’t even had a chance to hava a full night’s sleep yet and you have added to the instructions… :slight_smile:

Come on @TechMedX start showing off the fancy advanced stuff… Save me more time and work :slight_smile:

1 Like

Like?? Tell me what your interesting and I’ll post if I know.

I’ll start with some fairly “easy” stuff and then get more complex. The read me files are great, I’m not rewriting them. If you get stuck ask.

Includes these add-ons available in…

HACS > Frontend > + Explore & download repositories


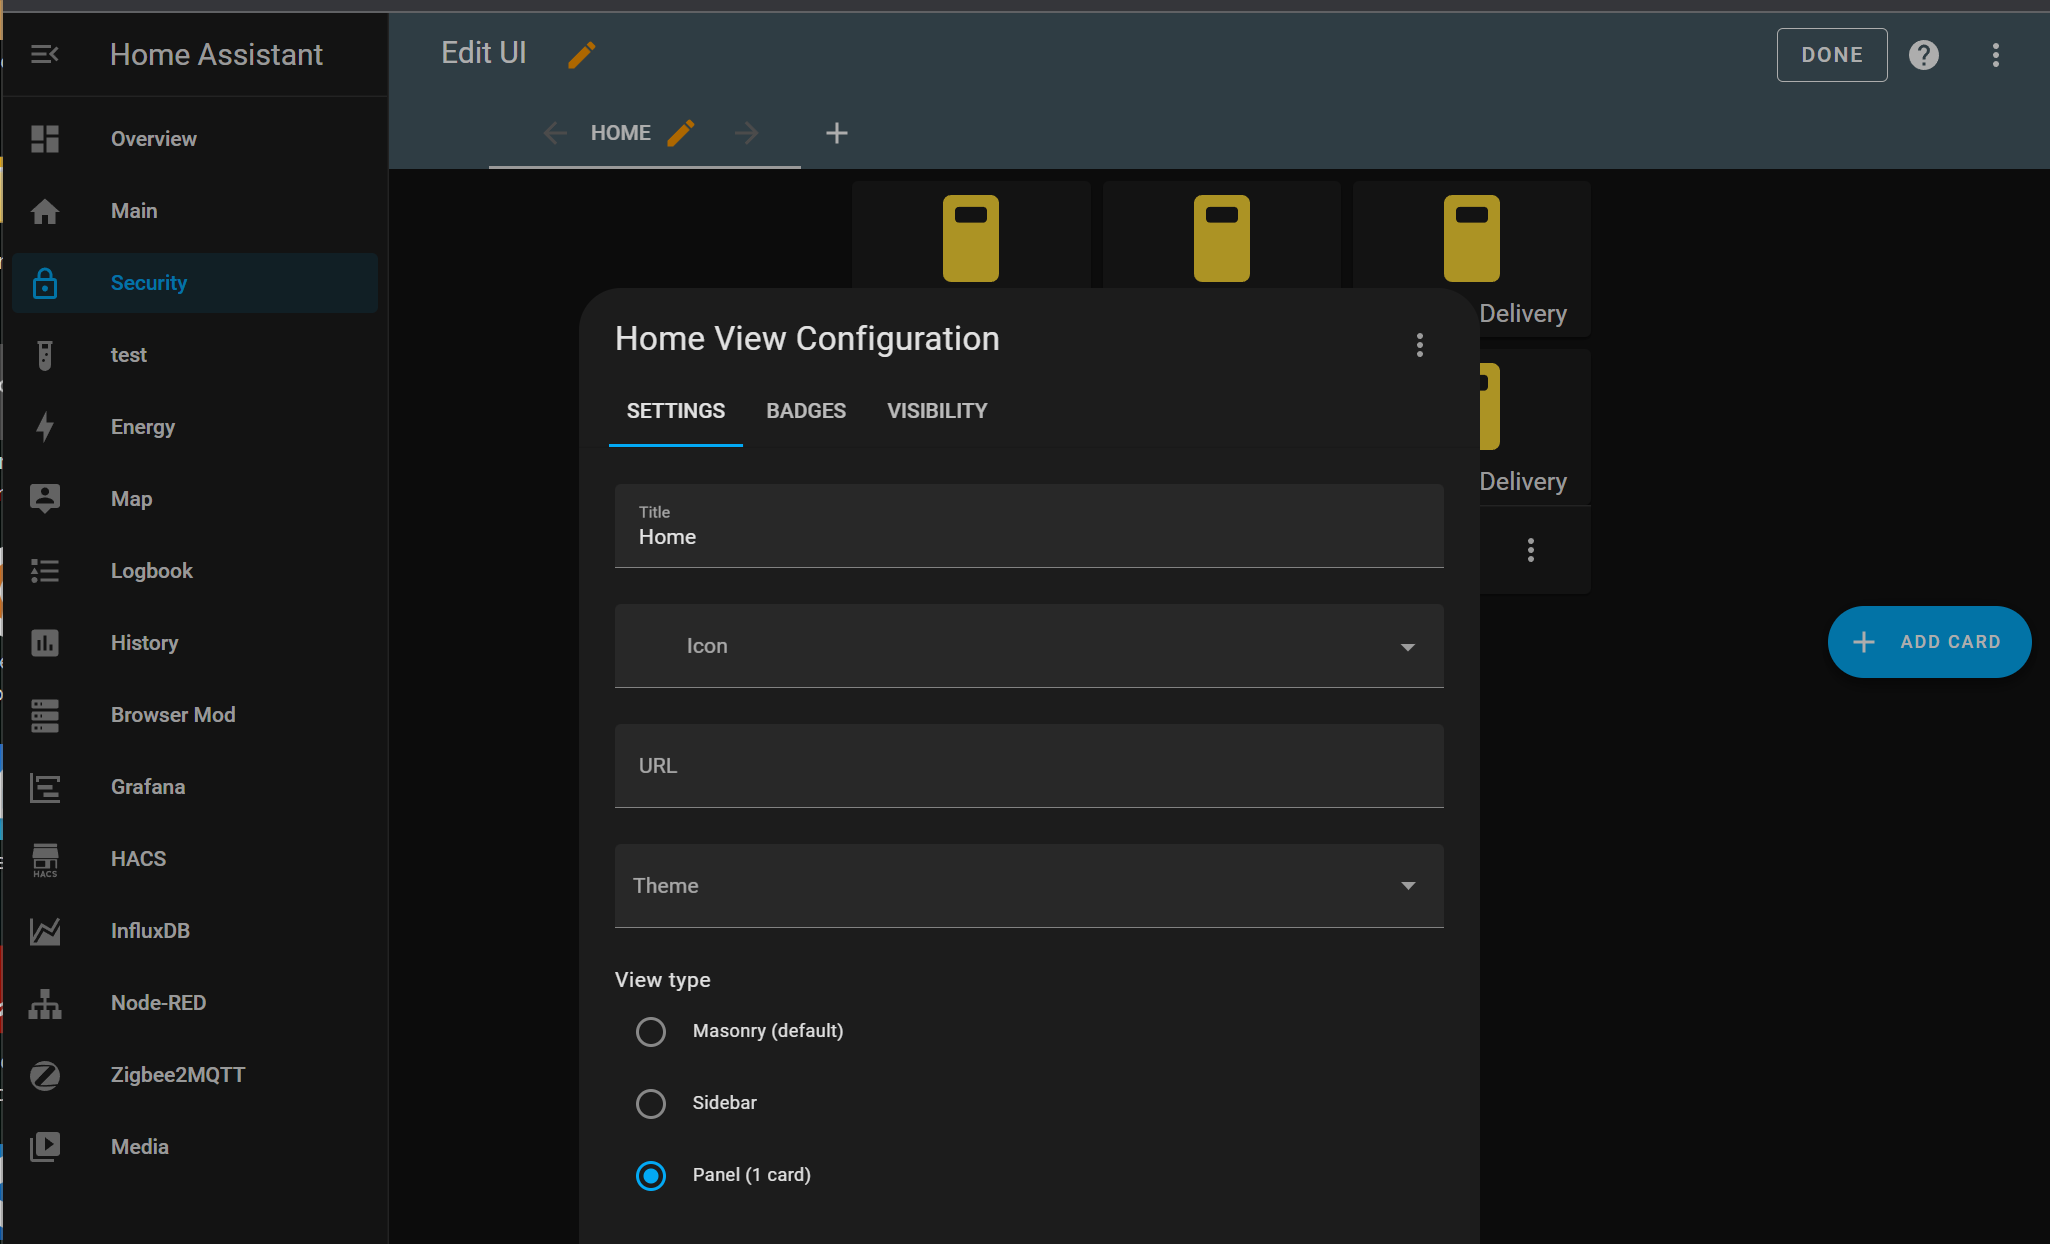
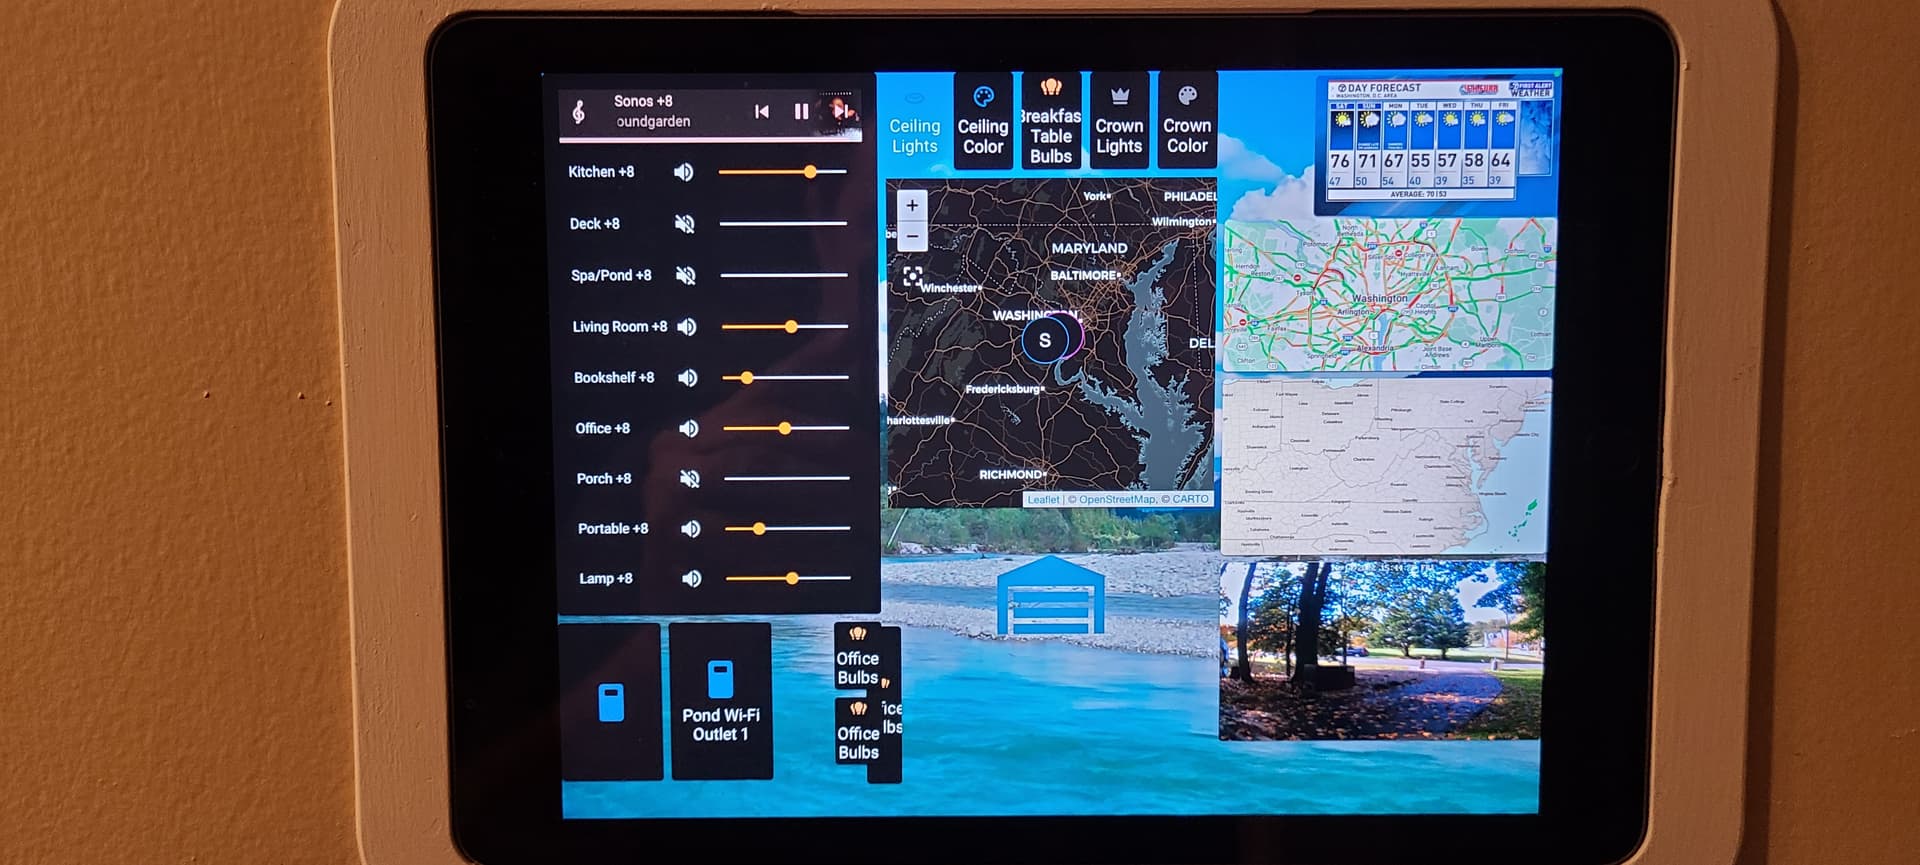
Kiosk mode - removes borders (per user helps if configuring on PC)


Animated backgrounds - decent backgrounds depending on local weather


These last two can get complex, so I’ll post what I’ve learned thus far.

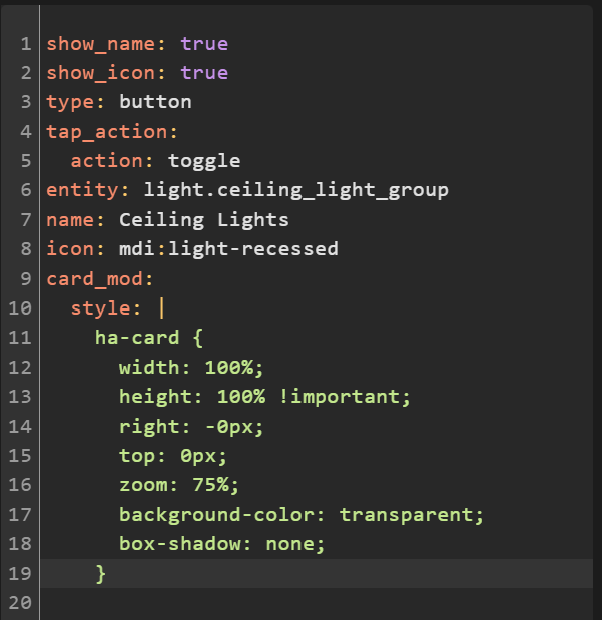
Card-mod - allows CCS edits per card.

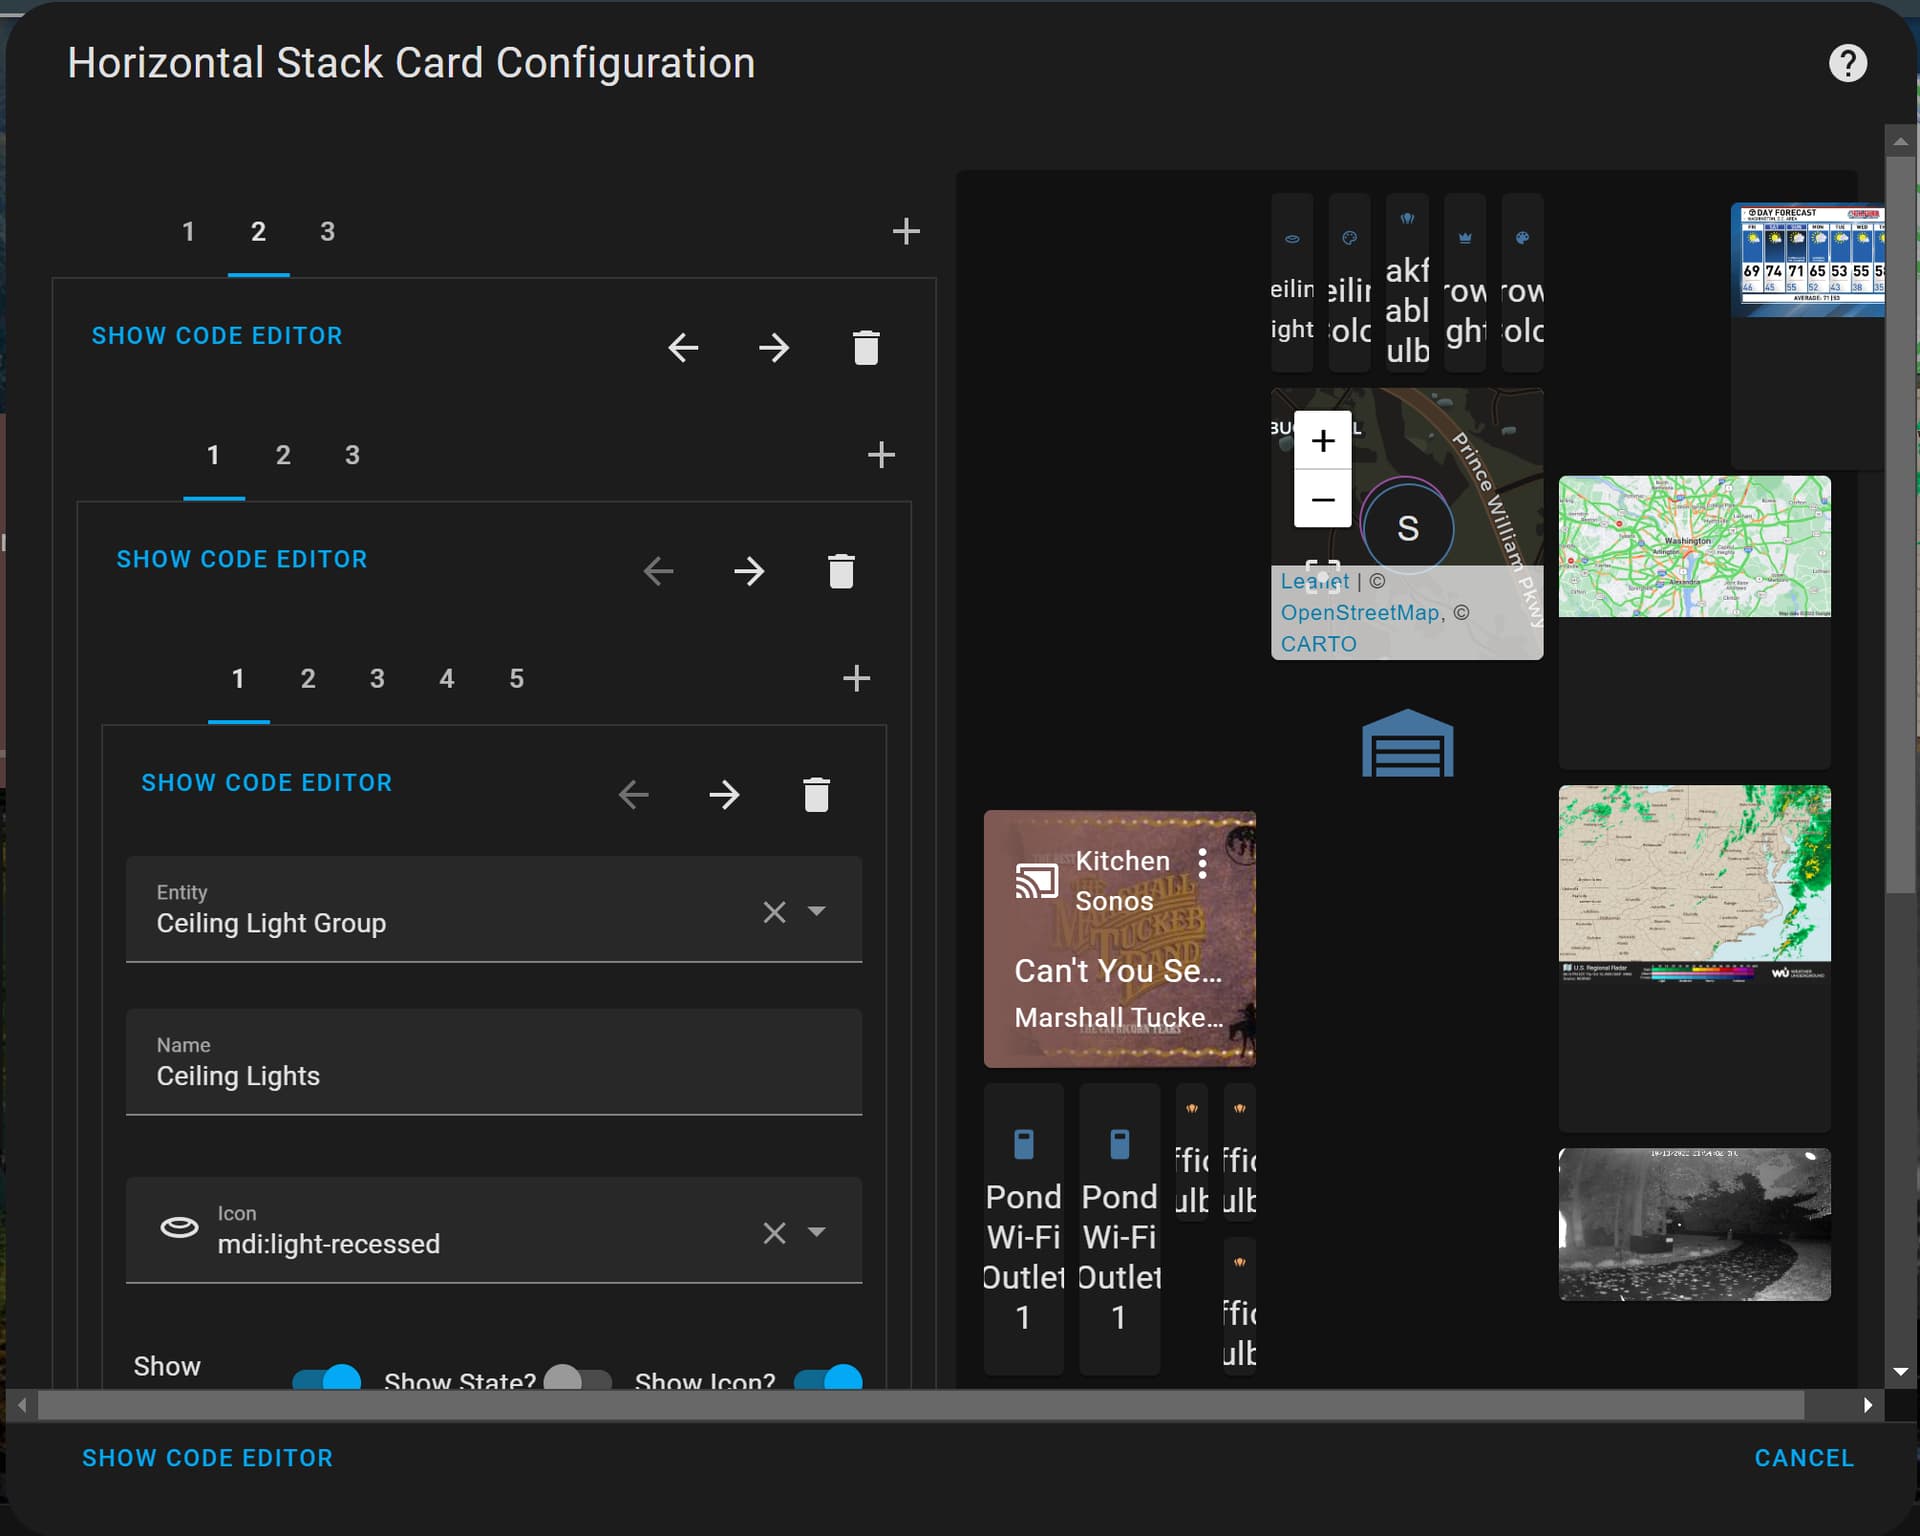
After installing card-mod click to a card you want to adjust. Click SHOW CODE EDITOR

It doesn’t seem to matter much where you put the code below as long as it is in the correct “indentation”. If I’m working on a single entity card I’ll stick it at the bottom. If working with multiple entities I stick it right under the “type” line so I can keep track of which entity I target with which CSS. I’m still not great with YAML (or CSS), so this could be completely against best practices, just what I have learned works for me.

YAML code example
card_mod:
  style: |
    ha-card {
      width: 100%;
      height: 100% !important;
      right: -0px;
      top: 0px;
      zoom: 75%;
      background-color: transparent;
      box-shadow: none;
    }

The examples that say 100% or 0 are just there so I can remember when/if I need them. Feel free to add/remove as needed. From what I’ve tried most standard CCS works
__

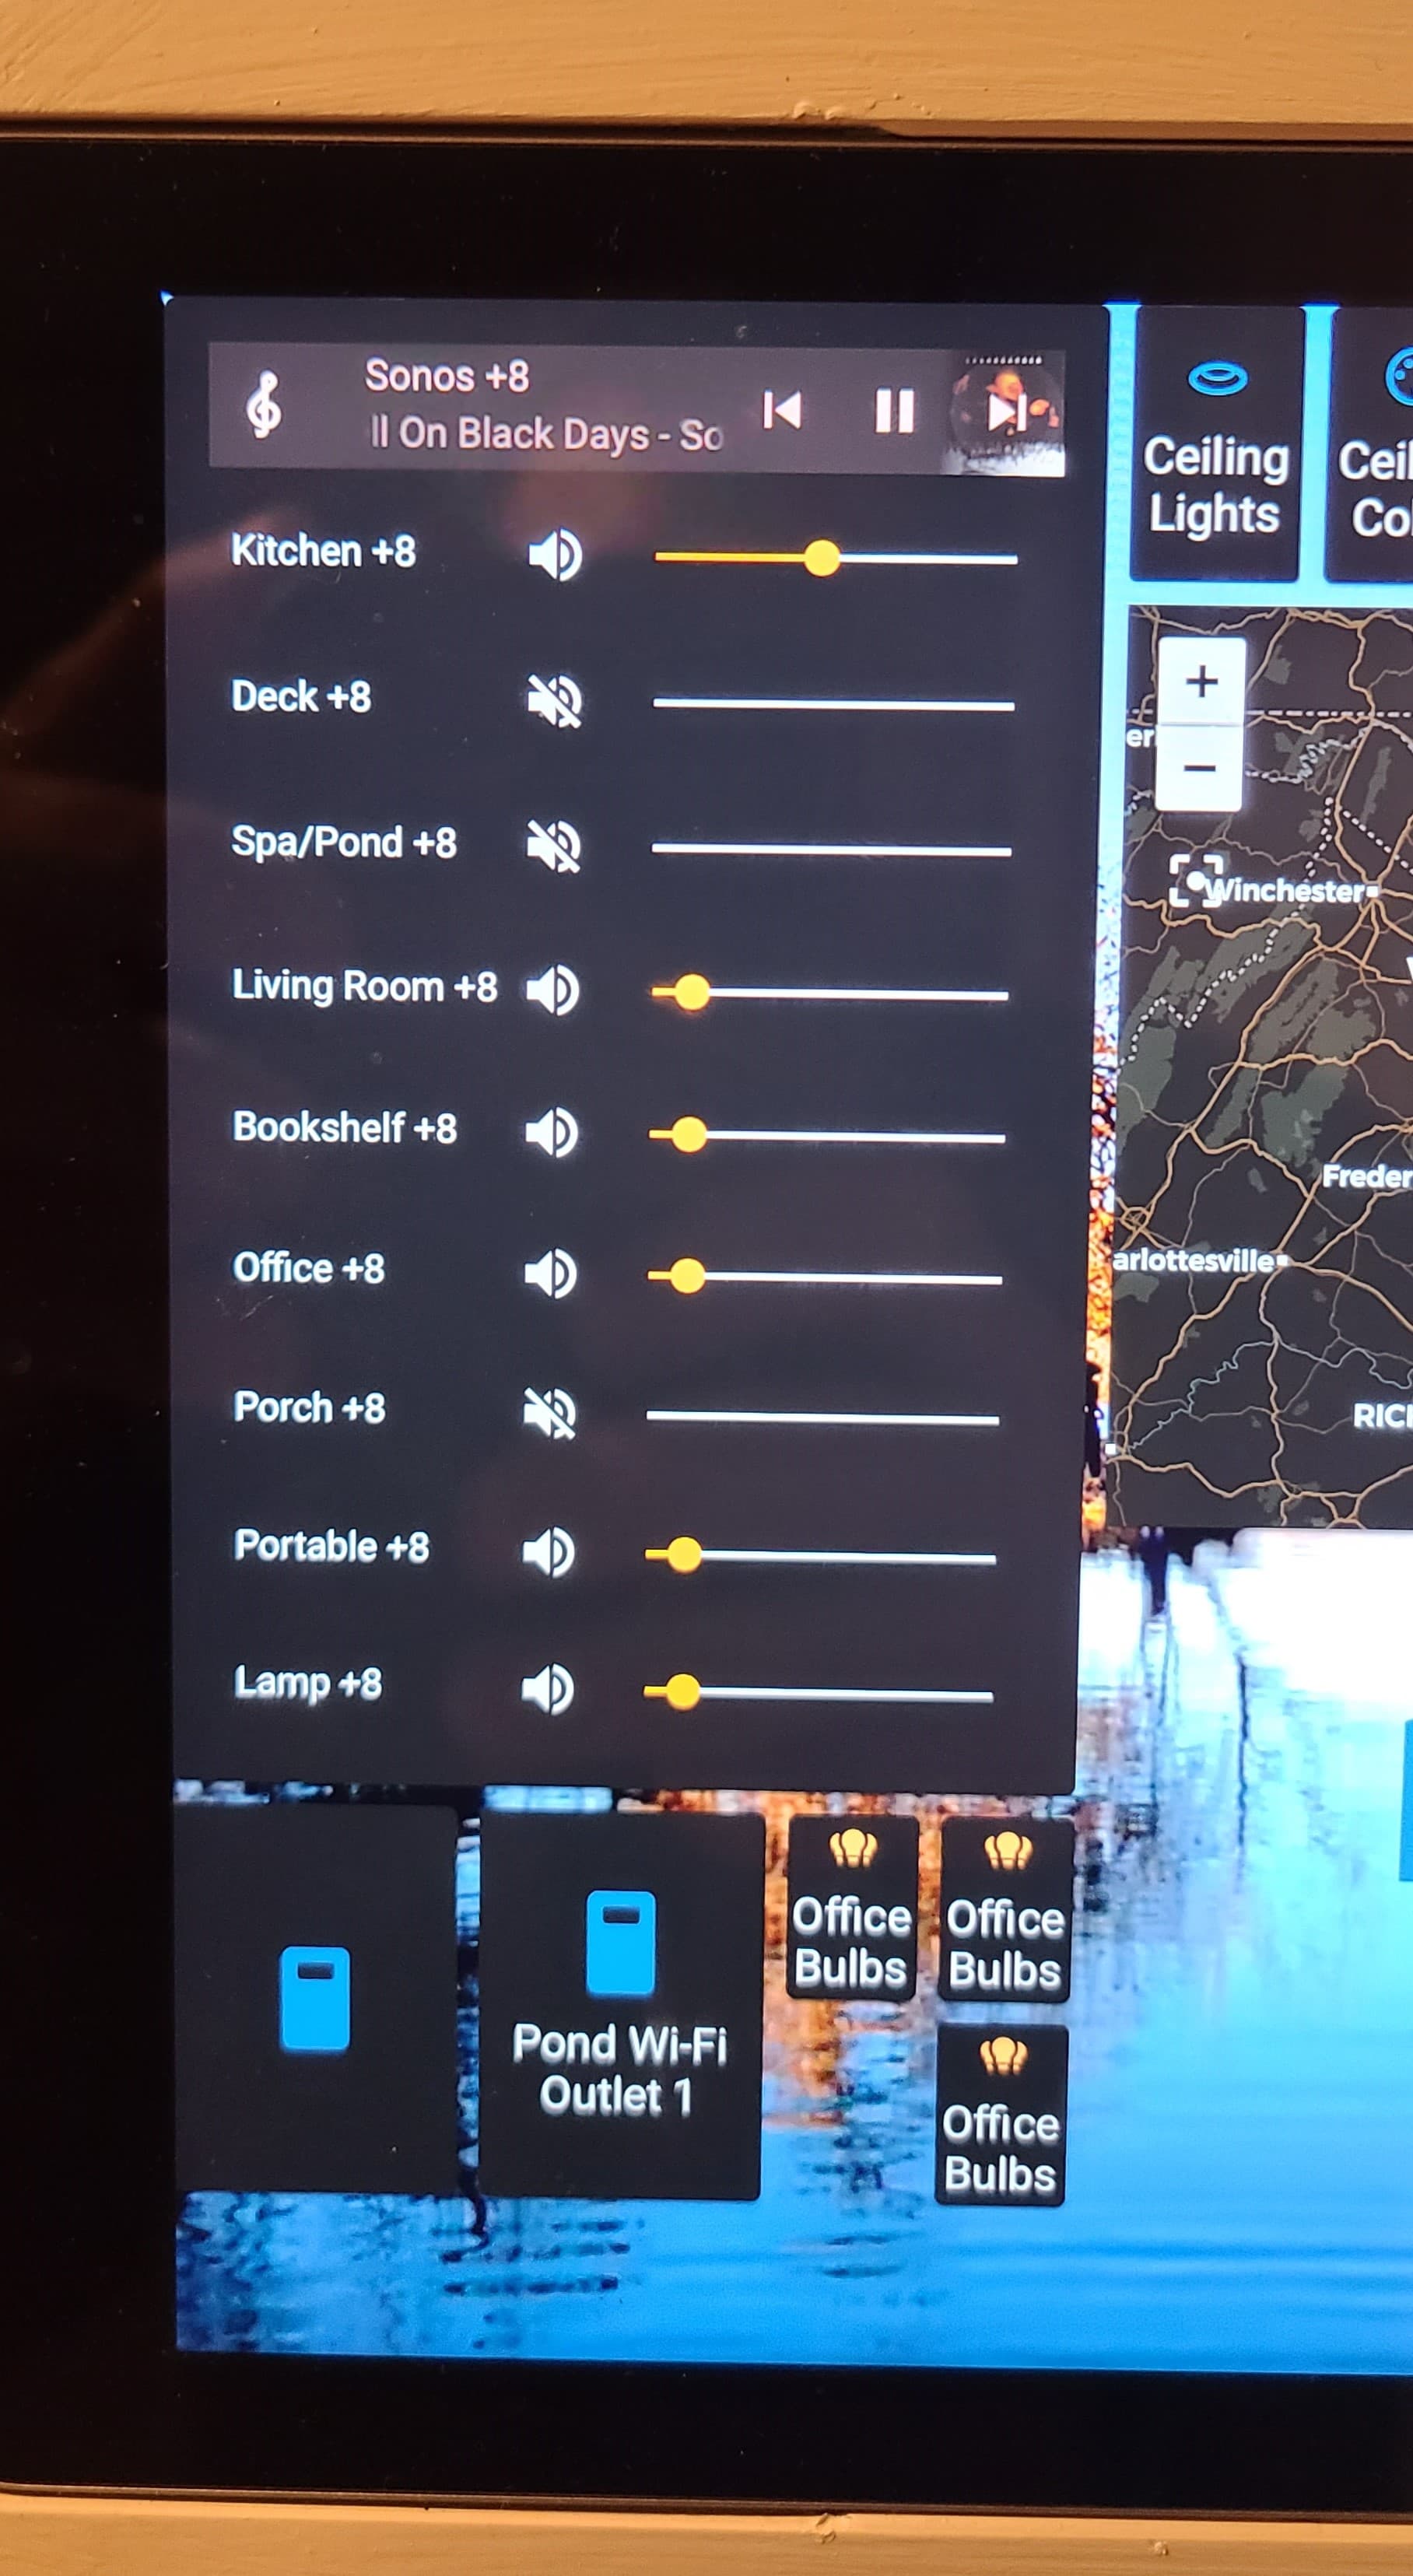
Mini media player - allows multiple media players in one card, lots of options.

I cannot tell a lie, I stole some YAML from the read me and edited it to my liking. There are sooooo many options on this one you really need to dig into the readme if you want to take full advantage of it.

Yes I prefer to “control” my music levels. :laughing:

YAML code example
type: entities
entities:
  - type: custom:mini-media-player
    entity: media_player.kitchen_sonos
    group: true
    source: icon
    artwork: material
    info: scroll
    name: Sonos
    hide:
      volume: true
      power: true
  - type: custom:mini-media-player
    entity: media_player.kitchen_sonos
    name: Kitchen
    artwork: none
    group: true
    hide:
      controls: true
      power: true
      source: true
      info: true
      icon: true
      progress: true
  - type: custom:mini-media-player
    entity: media_player.deck_sonos
    artwork: none
    name: Deck
    group: true
    hide:
      controls: true
      power: true
      source: true
      info: true
      icon: true
      progress: true
  - type: custom:mini-media-player
    entity: media_player.spa_pond
    artwork: none
    group: true
    hide:
      controls: true
      power: true
      source: true
      info: true
      icon: true
      progress: true
  - type: custom:mini-media-player
    entity: media_player.living_room_speaker
    artwork: none
    name: Living Room
    group: true
    hide:
      controls: true
      power: true
      source: true
      info: true
      icon: true
      progress: true
  - type: custom:mini-media-player
    entity: media_player.bookshelf
    artwork: none
    group: true
    hide:
      controls: true
      power: true
      source: true
      info: true
      icon: true
      progress: true
  - type: custom:mini-media-player
    entity: media_player.office_sonos
    artwork: none
    name: Office
    group: true
    hide:
      controls: true
      power: true
      source: true
      info: true
      icon: true
      progress: true
  - type: custom:mini-media-player
    entity: media_player.porch
    artwork: none
    group: true
    hide:
      controls: true
      power: true
      source: true
      info: true
      icon: true
      progress: true
  - type: custom:mini-media-player
    entity: media_player.portable
    artwork: none
    group: true
    hide:
      controls: true
      power: true
      source: true
      info: true
      icon: true
      progress: true
  - type: custom:mini-media-player
    entity: media_player.lamp
    artwork: none
    group: true
    hide:
      controls: true
      power: true
      source: true
      info: true
      icon: true
      progress: true

That should shave a few hours off getting started! I think that pretty much covers where I’m at currently (yes I messed up the bottom column writing this, easily fixed. :wink:

1 Like

for reference or anyone interested.

tile color based on entity state

    card_mod:
      style: |
        ha-card {
          background-color:
            {%- set sensor = states('light.office_bulbs_2') %}
            {%- if sensor == 'on' %}transparent
            {%- elif sensor == 'off' %}rgba(0,0,0,0.6)
            {%- else %}#006405
            {%- endif %};
        }